Getting started / Activation
This guide describes how you active an PAX device and connect it to a merchant account.
Valid for devices:
- PAX A920
- PAX A920 Pro
- PAX A50
- PAX A80
- PAX IM30
- PAX A30
- PAX A35
Default passwordThe default password for accessing the settings menu (to enable wifi) for all PAX devices is pax9876@@
Remove the battery protection (only A920 & A920 Pro)
Before you start charging your PAX terminal, make sure to remove the battery protection. Its a white tape located in the battery compartment.
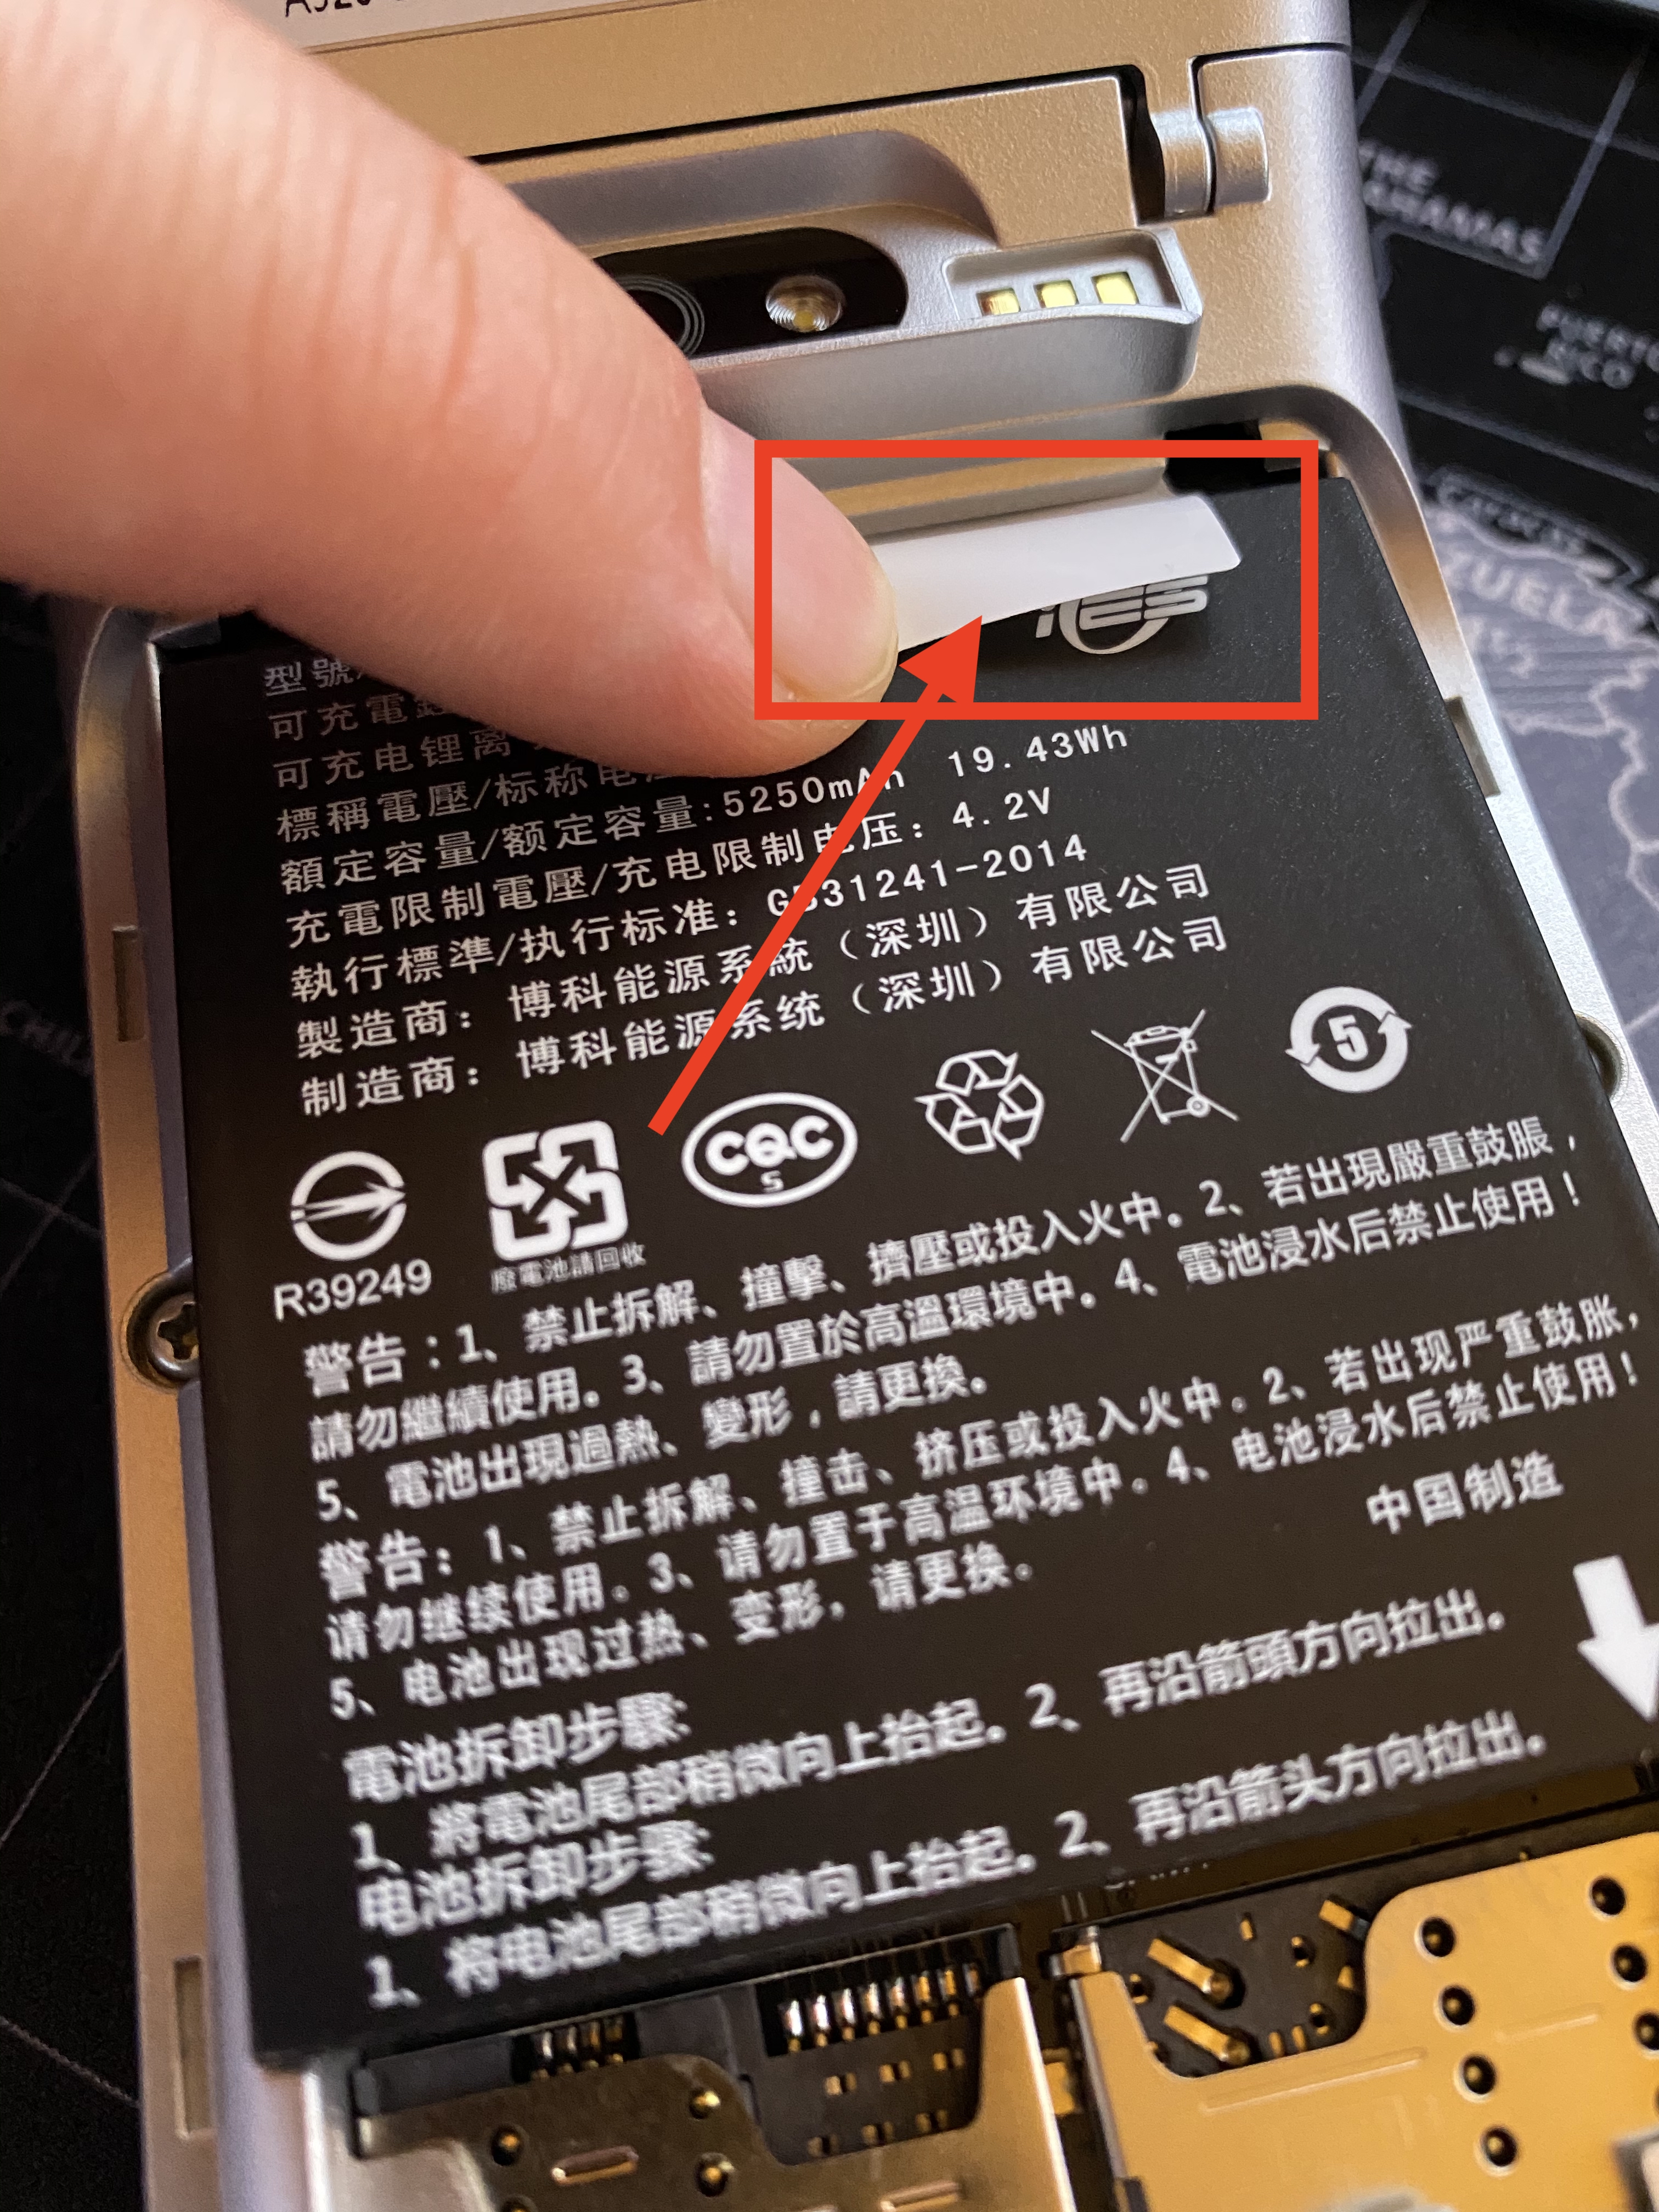
Just pull out the battery, remove the tape and put the battery back in.
Connect your terminal to WiFi
We recommend connecting your terminal to a local WiFi even if you have a SIM card installed for a redundant connection.
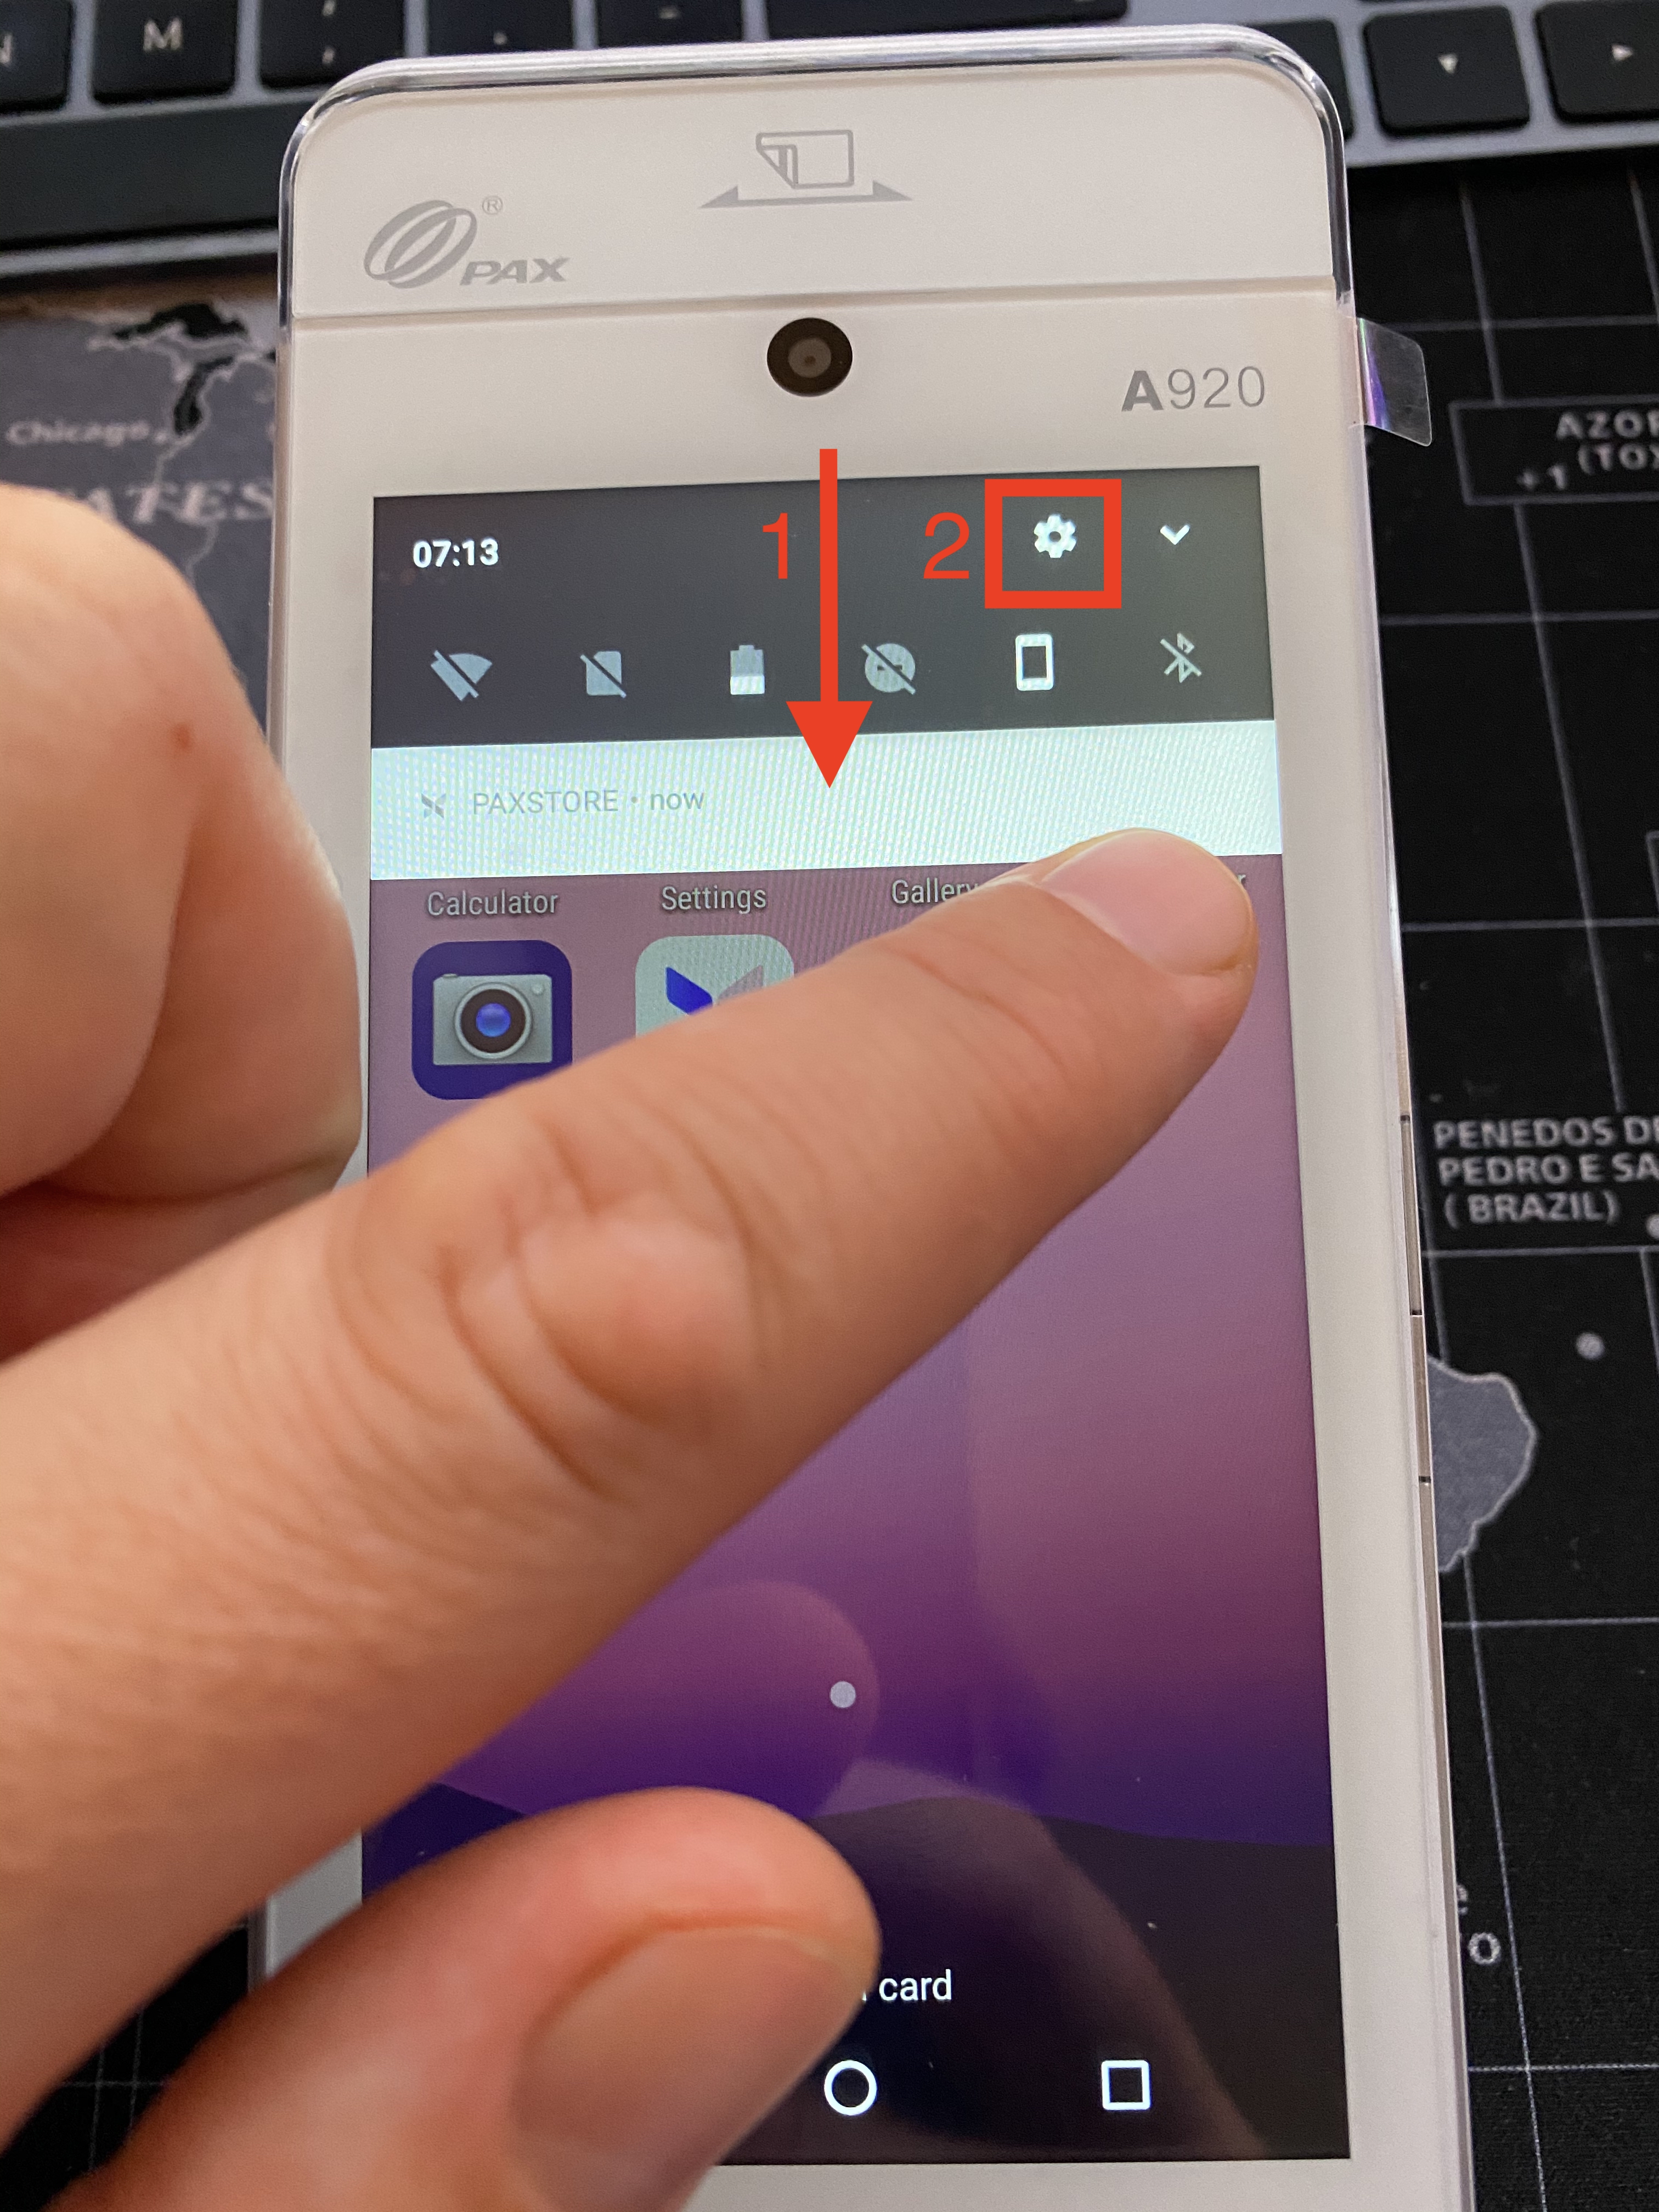
Start the terminal with the power button on the side. Once its booted into Paydroid swipe your finger from the top of the screen down (1) so the settings meny is exposed. Then click the little gear icon (2)
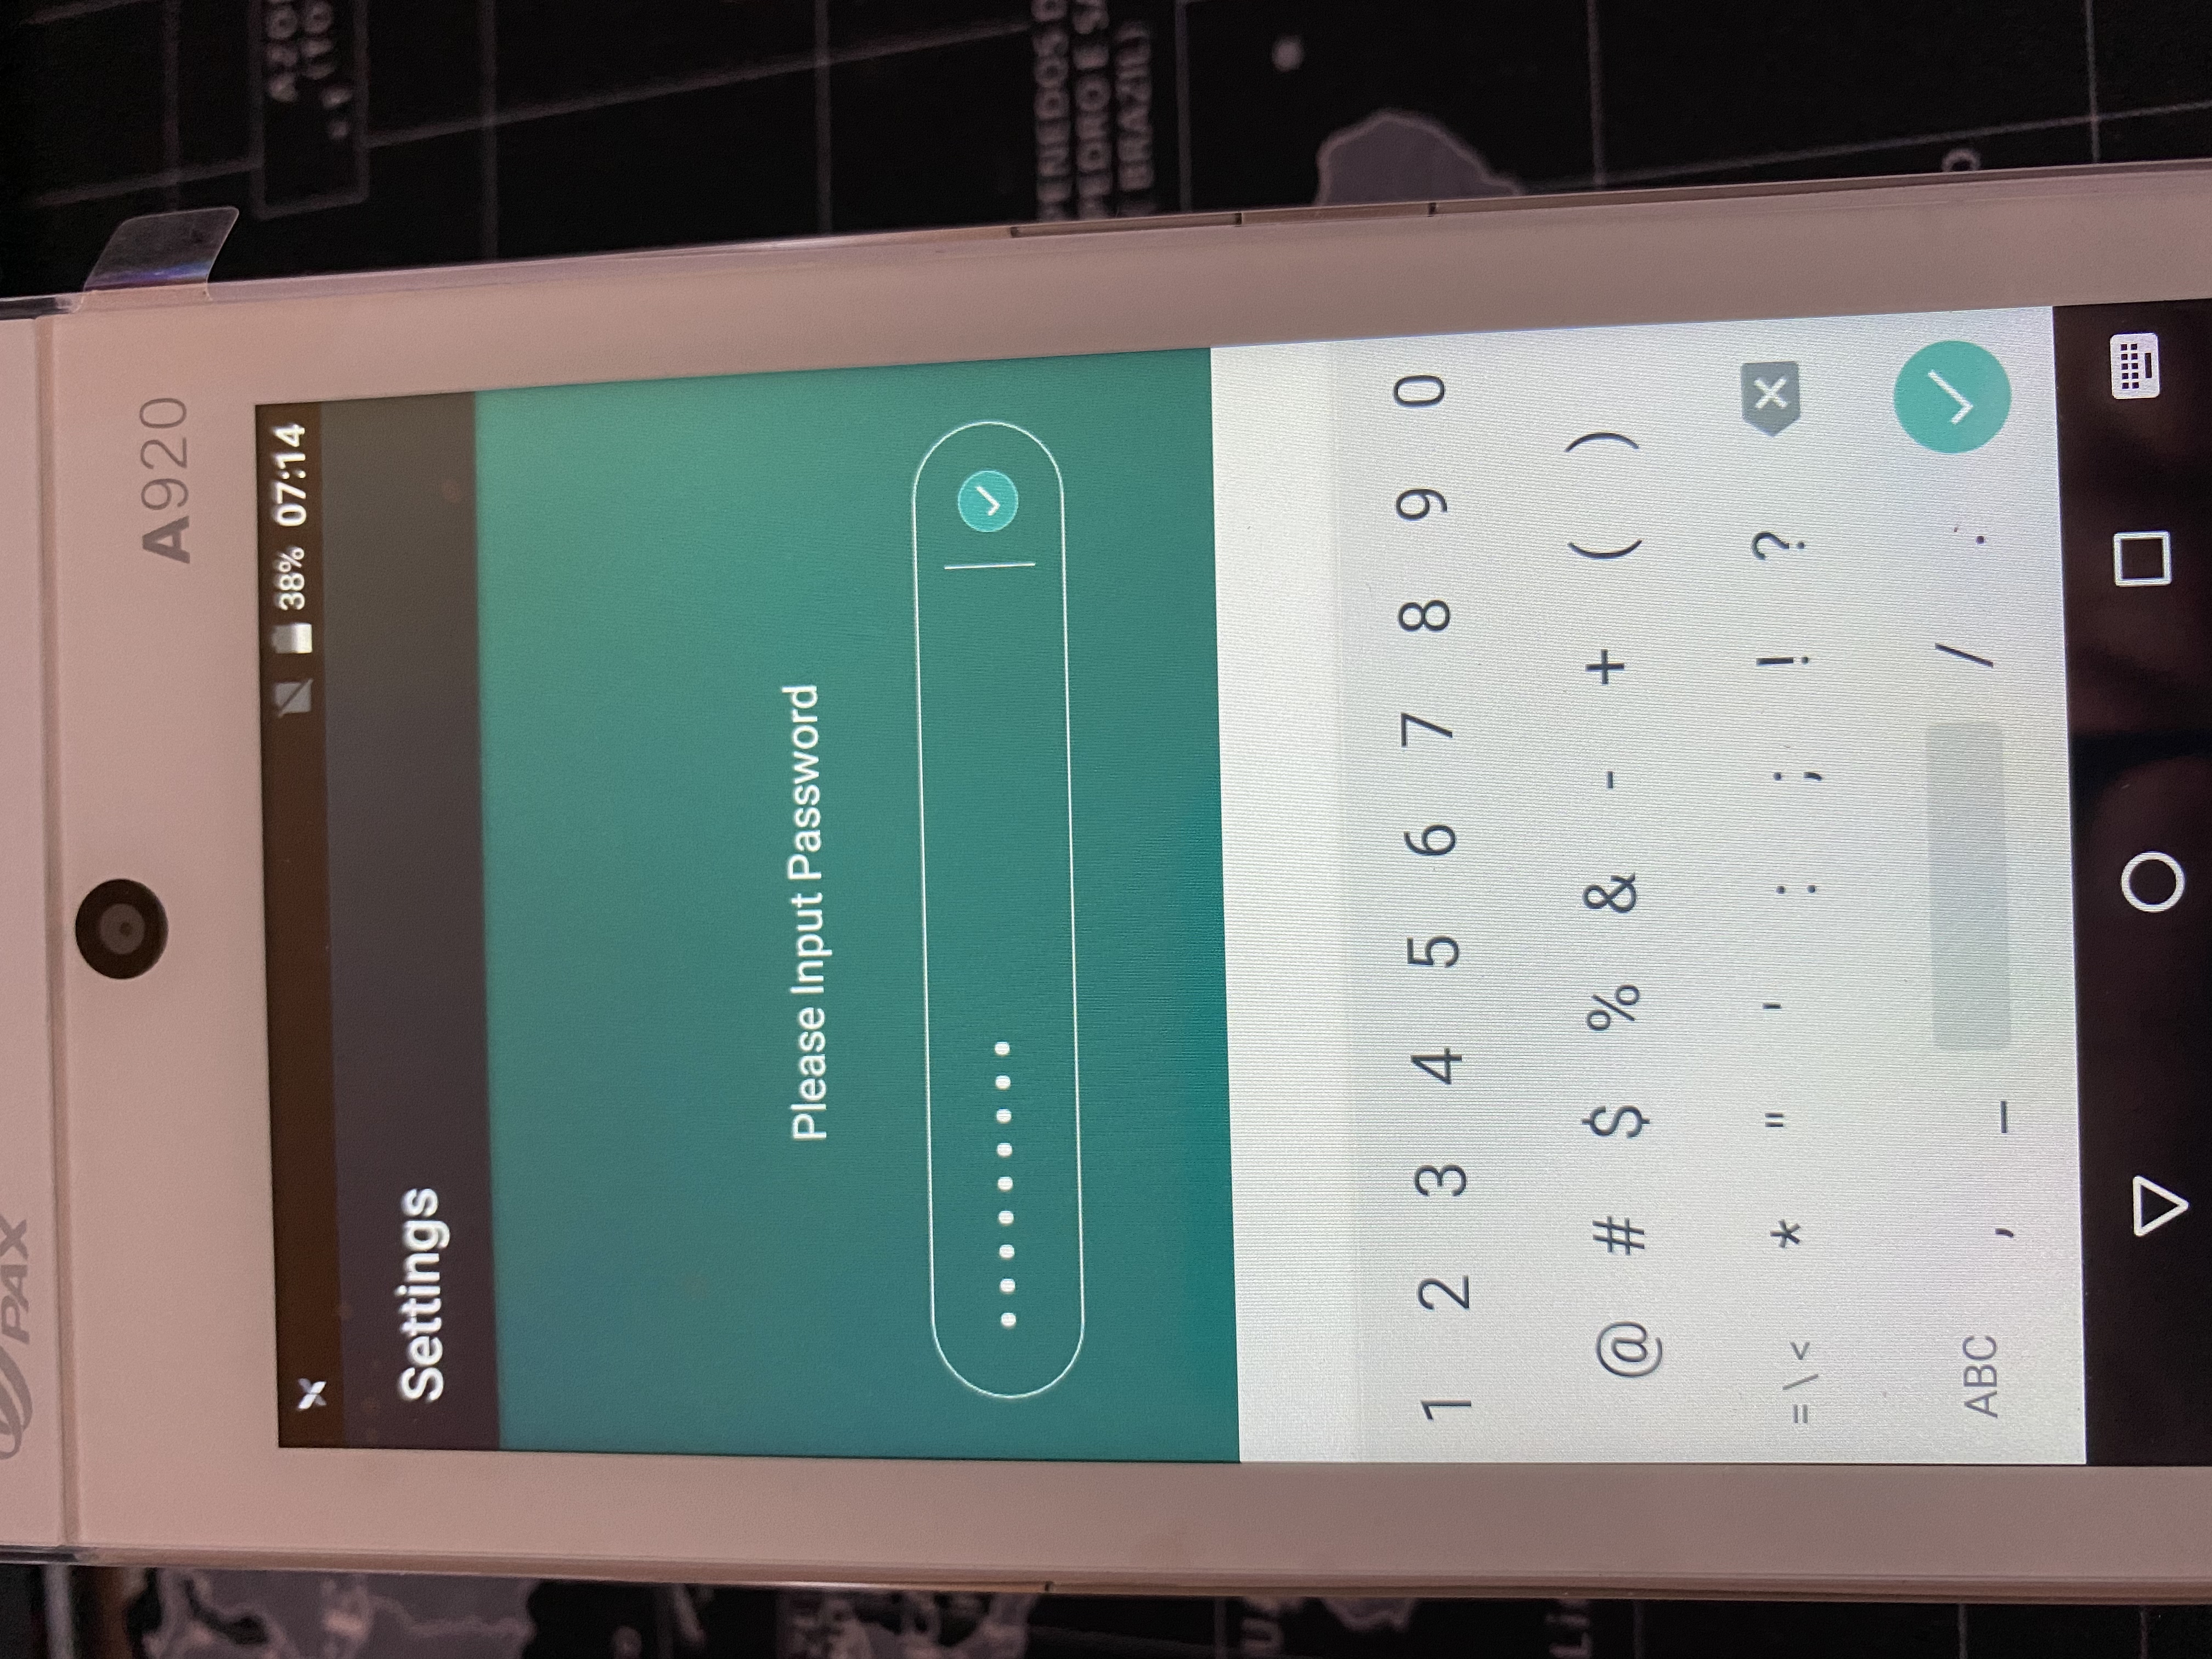
Enter the password pax9876@@ to access settings.
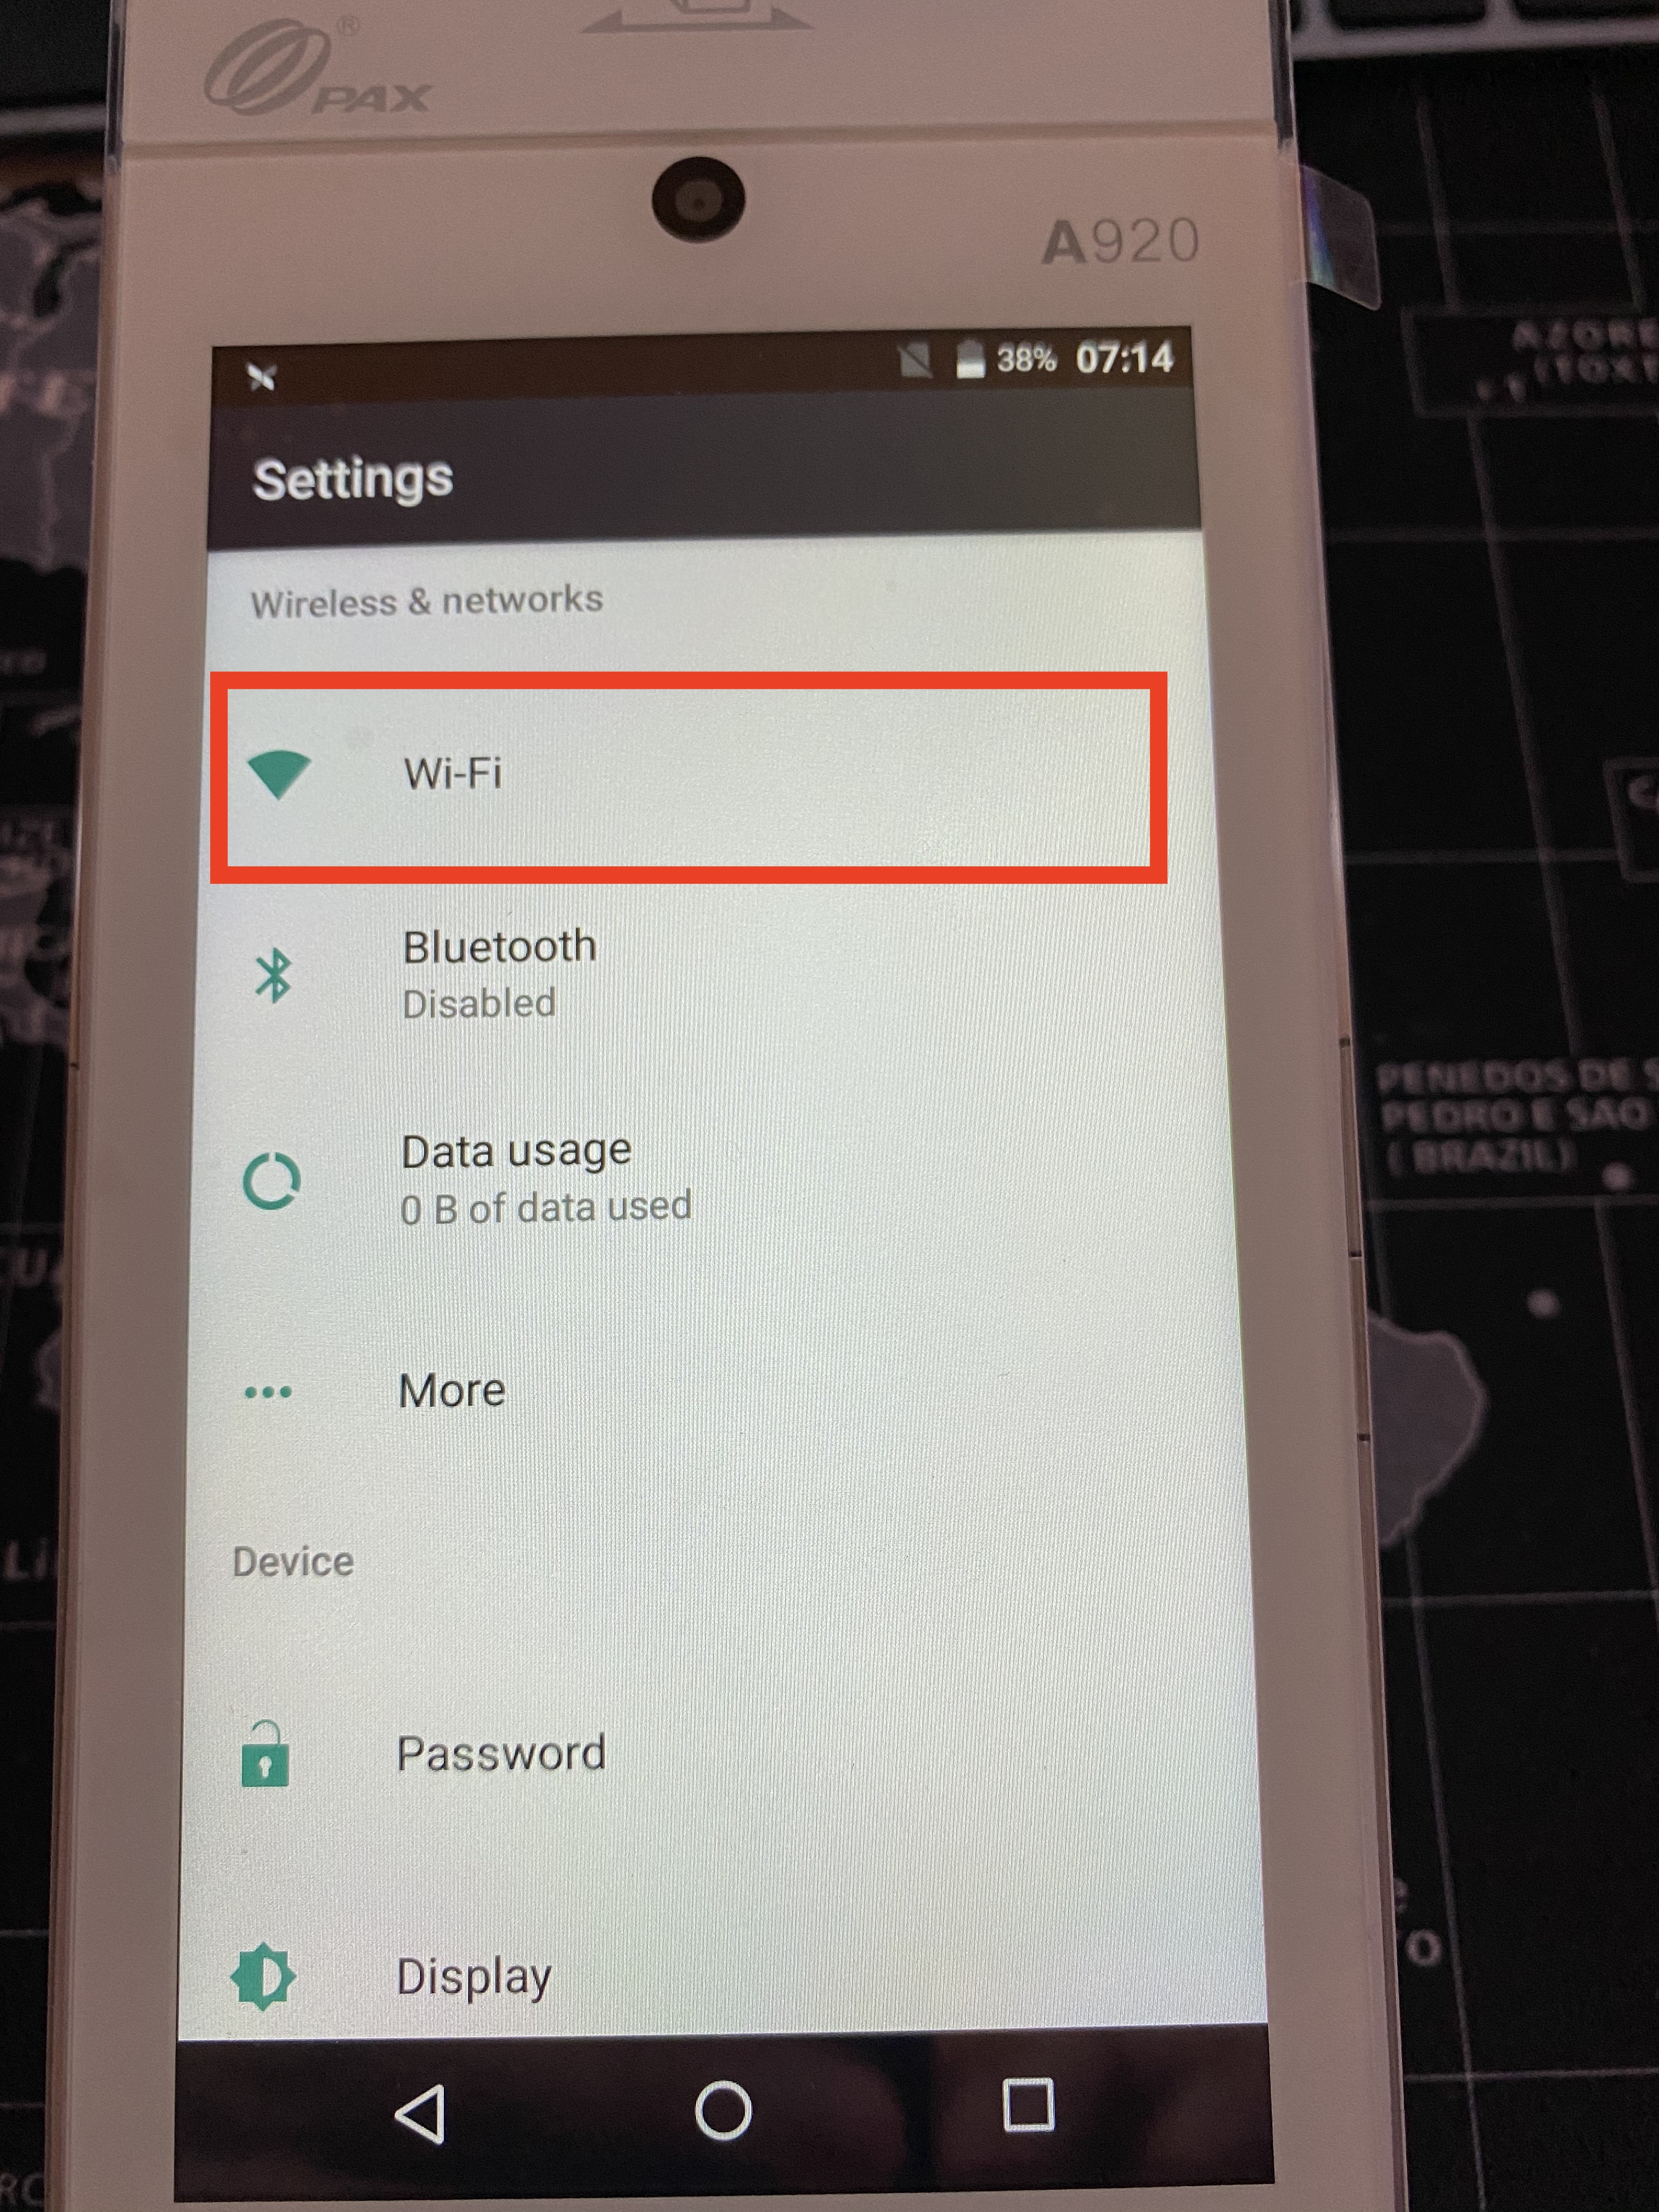
Click on wifi (or Ethernet for PAX A80)
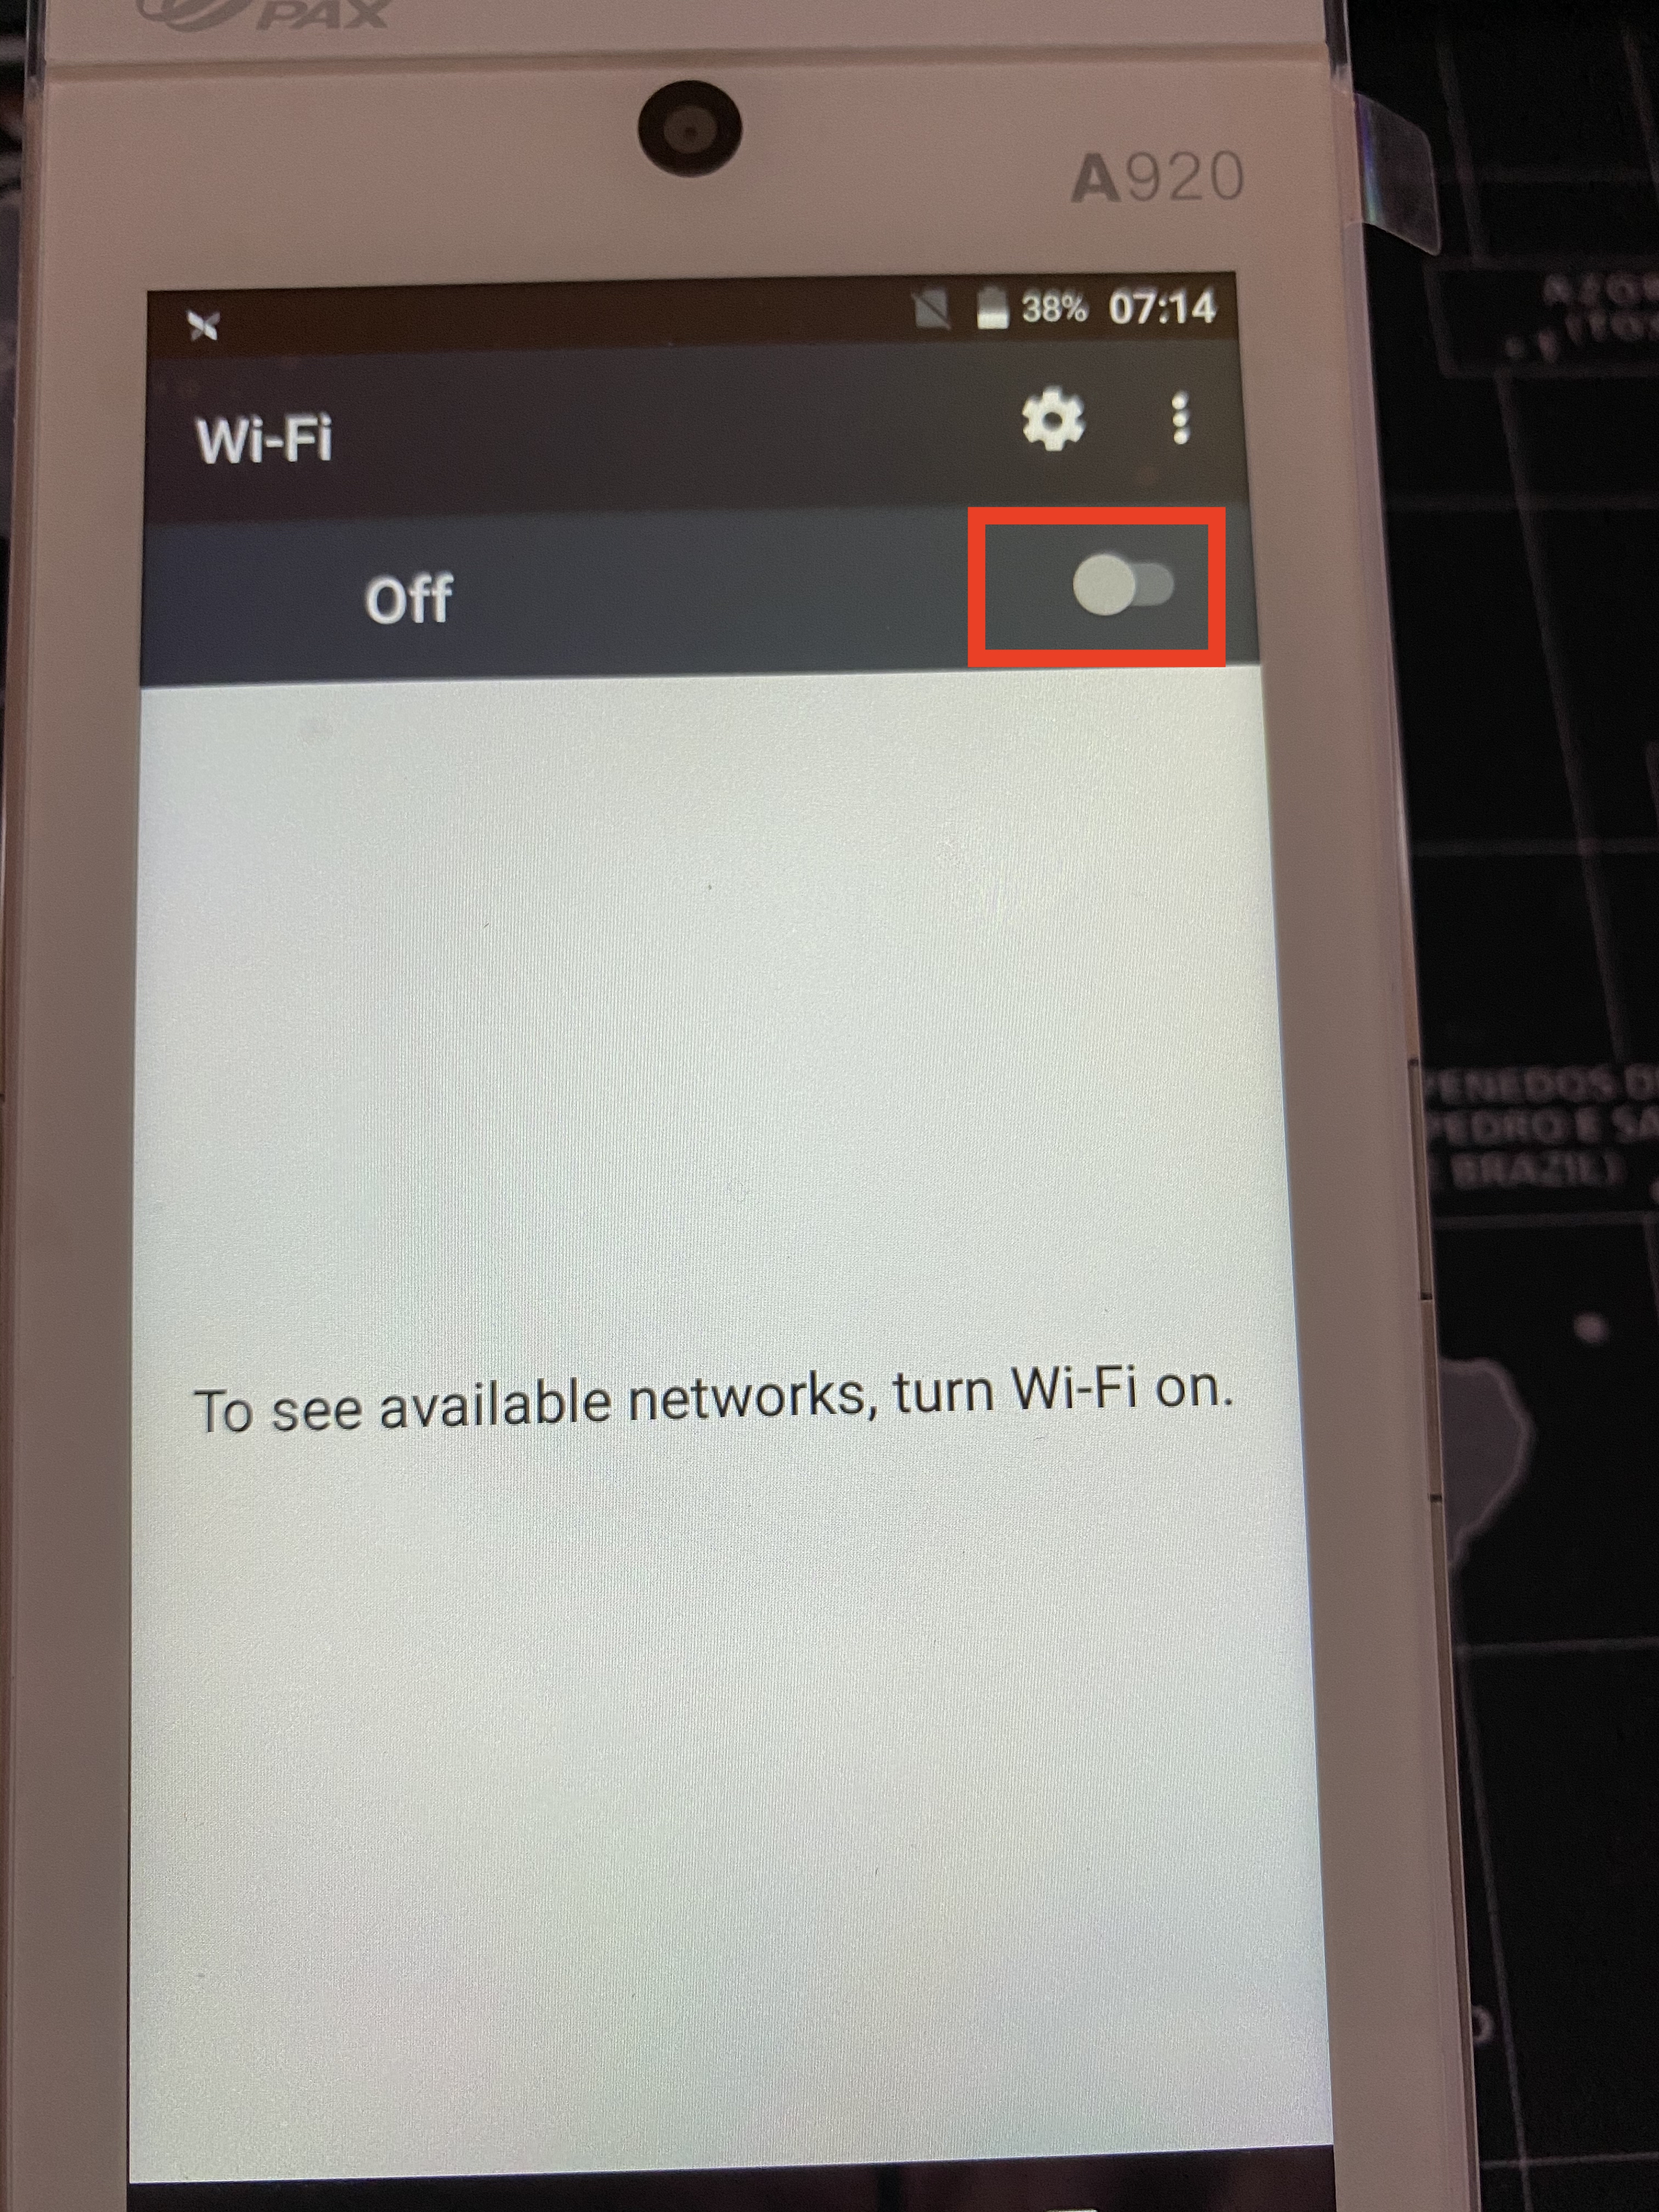
Enable WiFi (or Ethernet) by flipping this switch
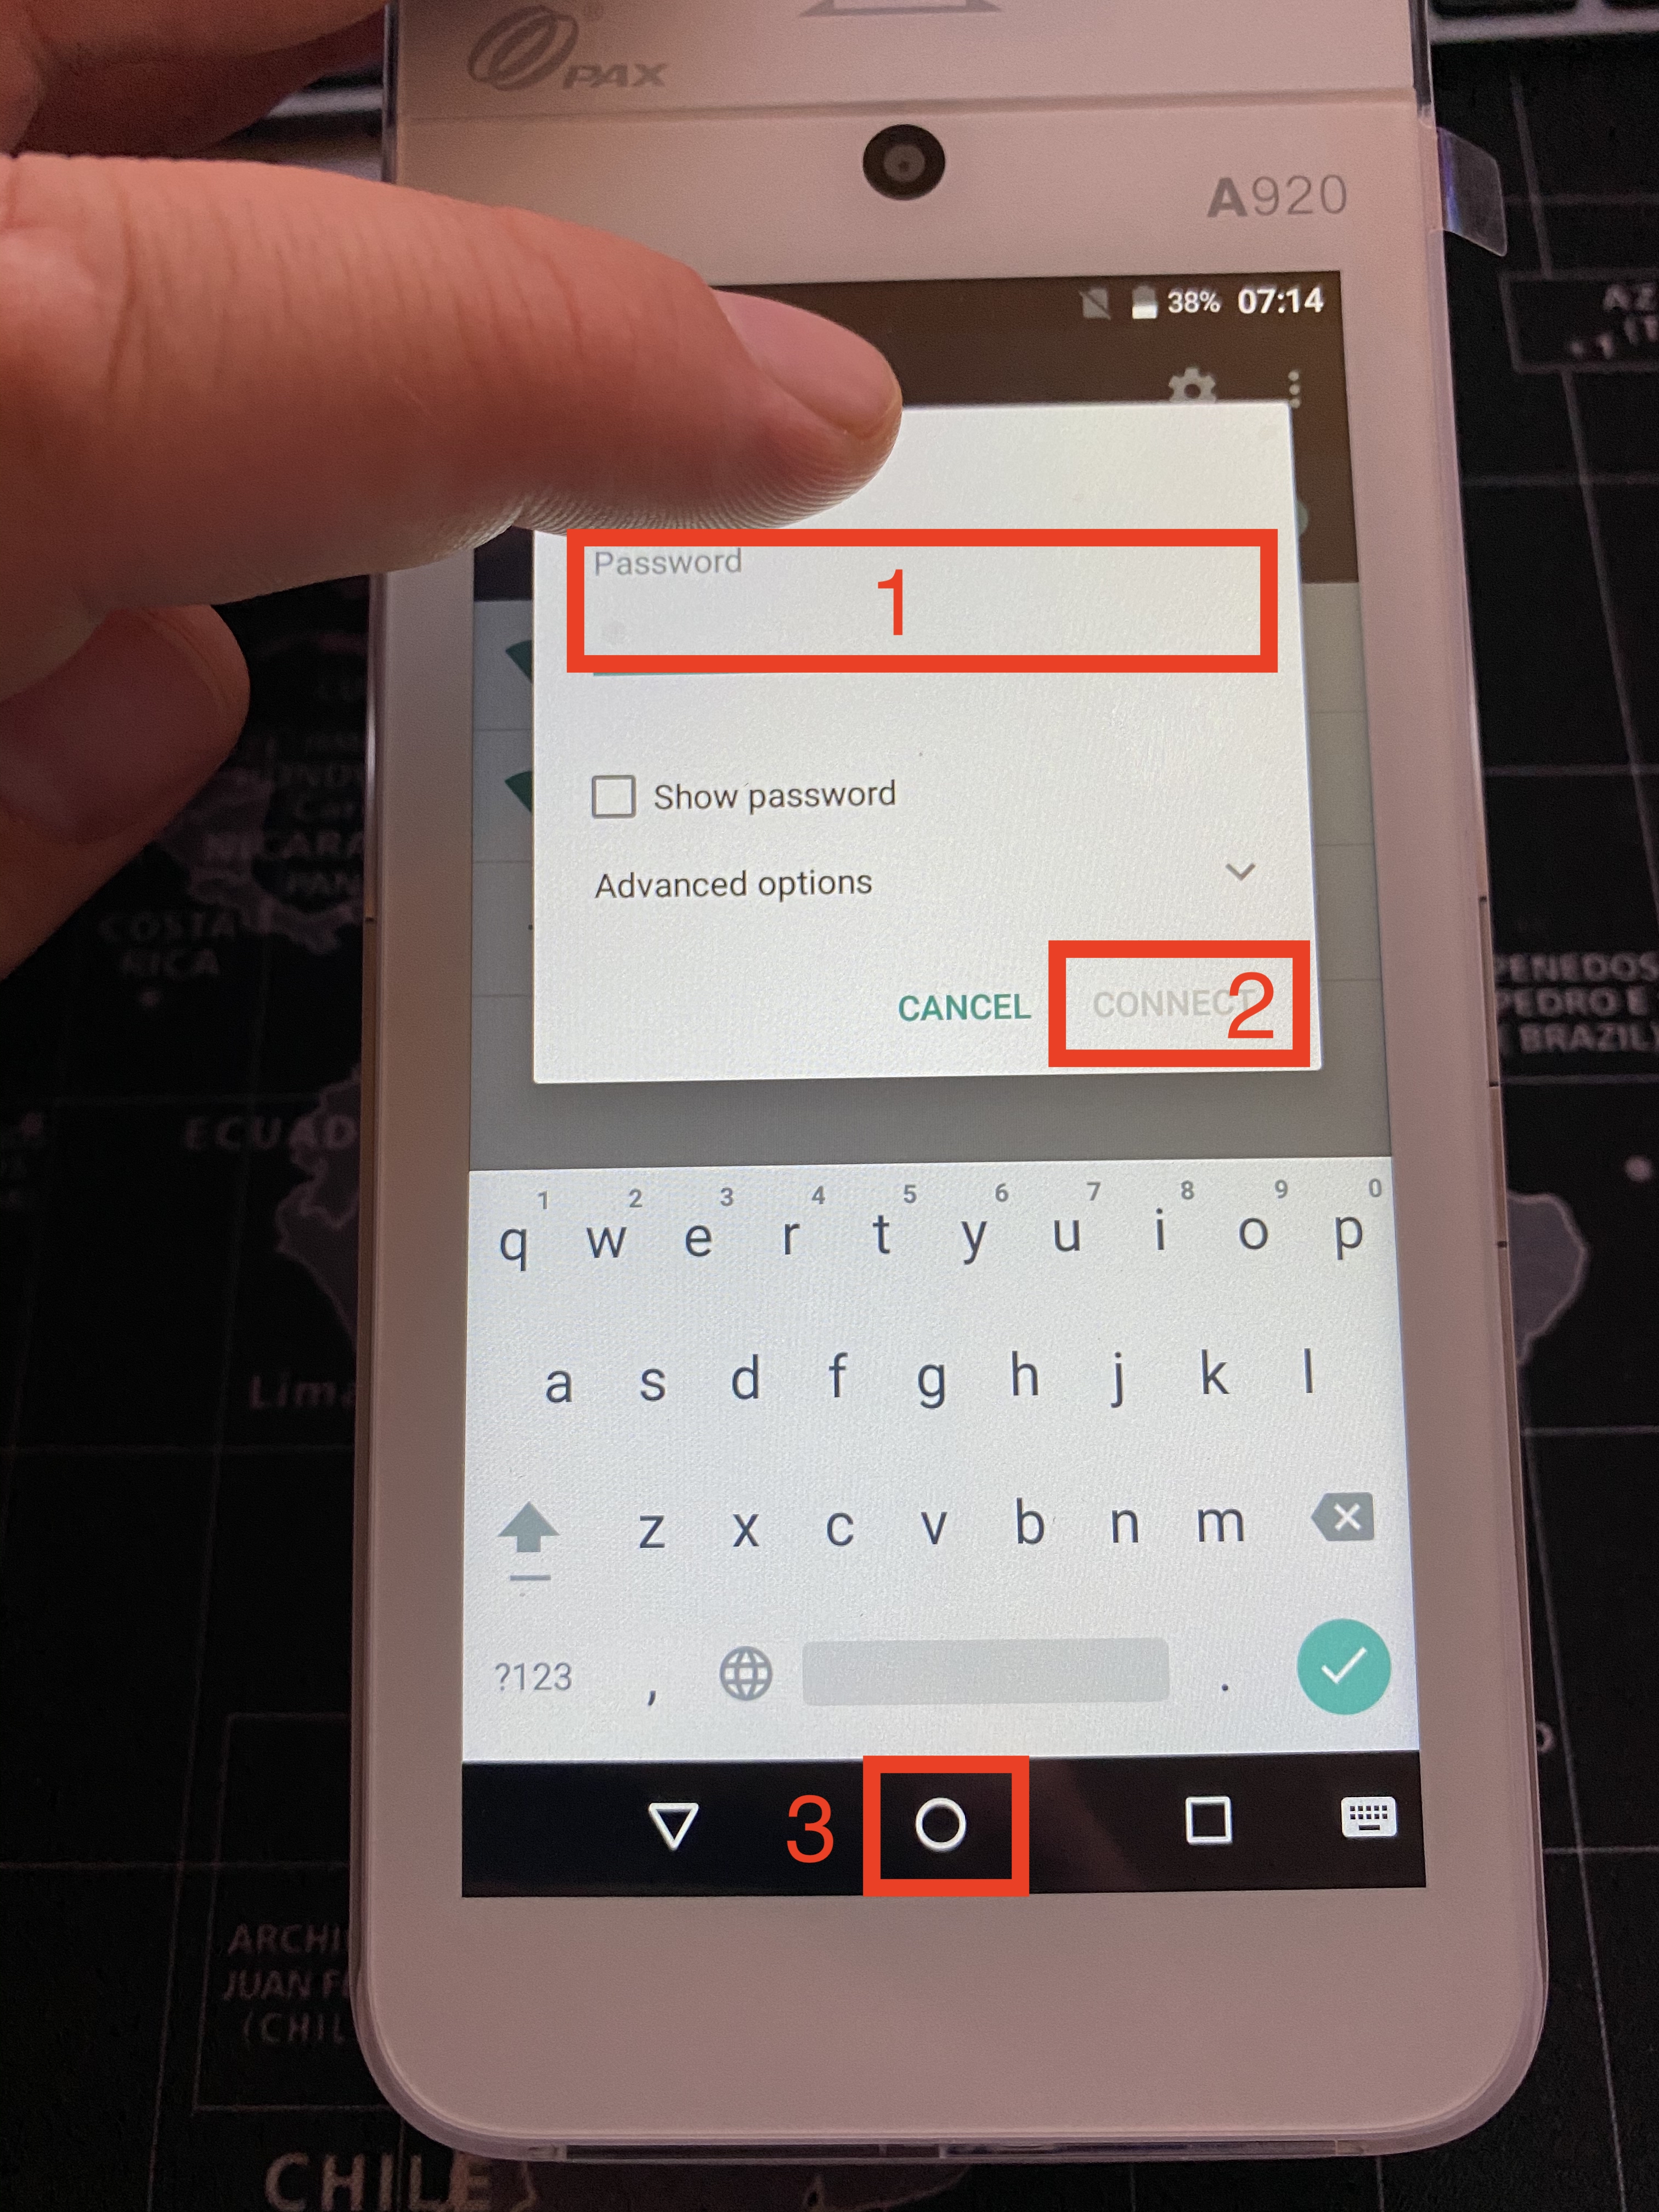
Select your WiFi network and enter the WiFi key (1), then press connect (2). Once you are connected, go back to the Home Screen by pressing the home button (3)
Add the terminal to your terminal estate
Before you can connect a terminal to a merchant account, you have to add the terminal to your terminal estate. You can do this manually for a single terminal or add a batch of terminals by uploading a batch file to your partner portal. This guide will show how to do it with a single terminal.
Log in to your Hips Partner Portal.
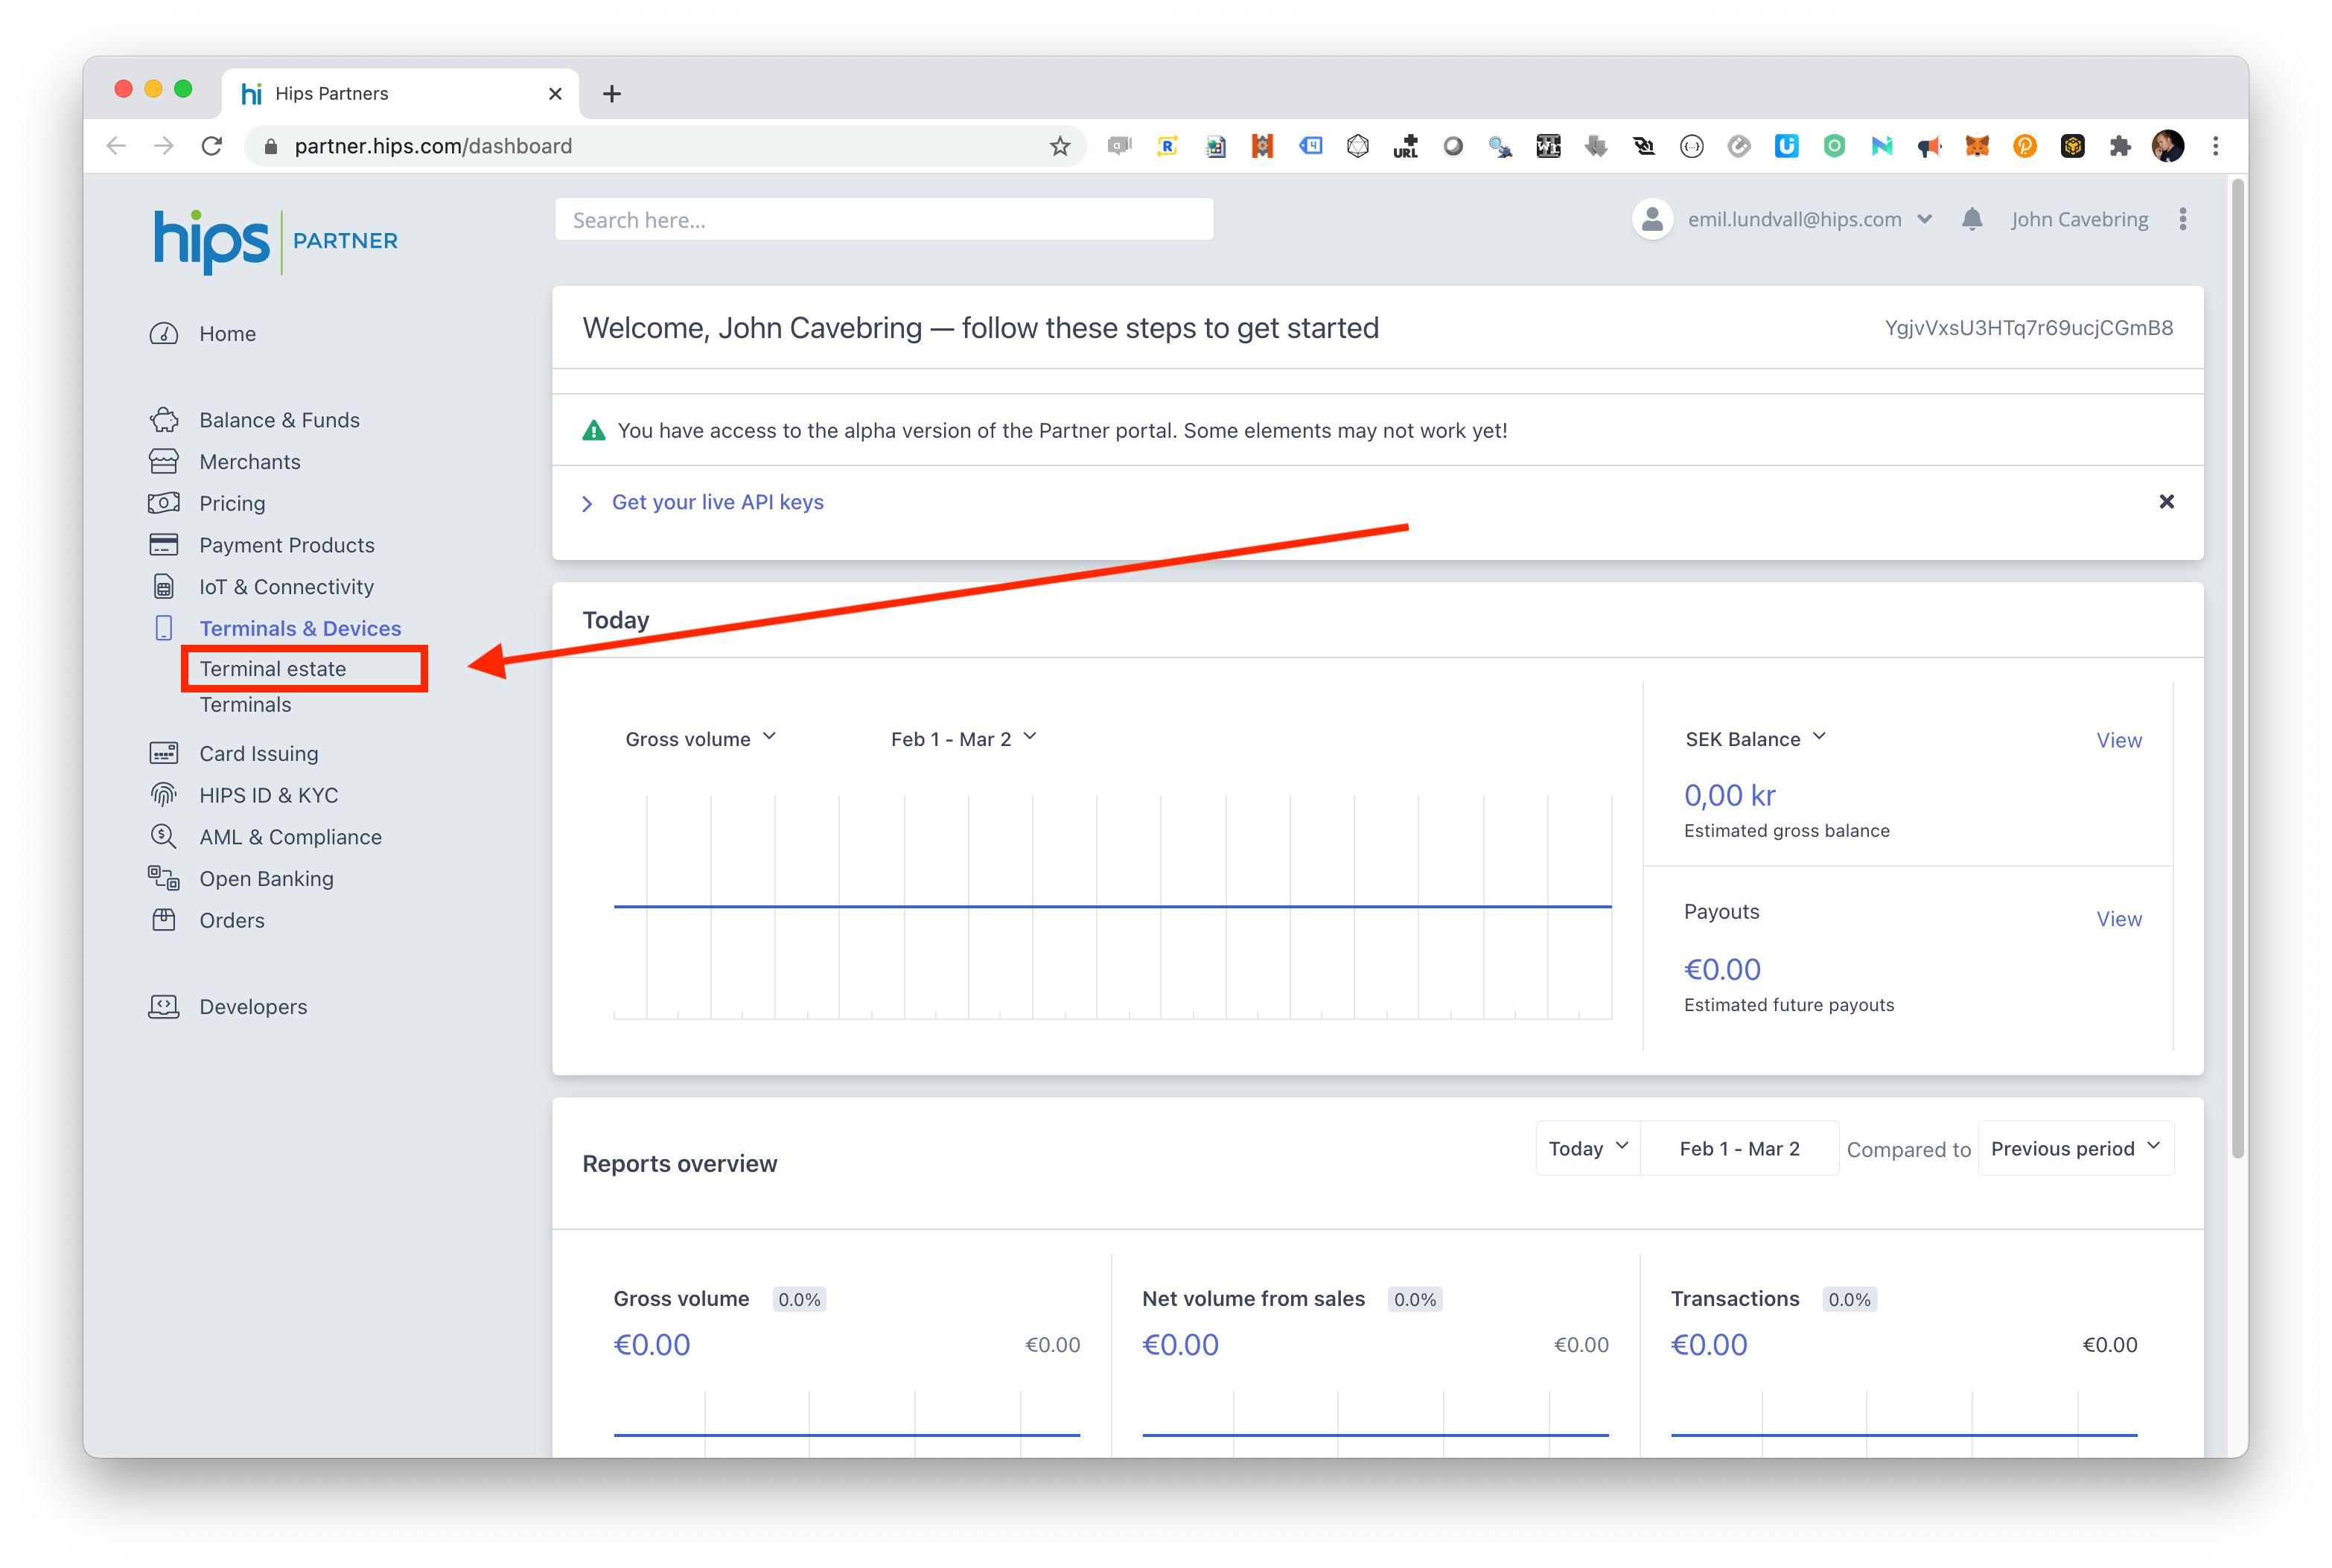
Select terminal estate in the menu to the left
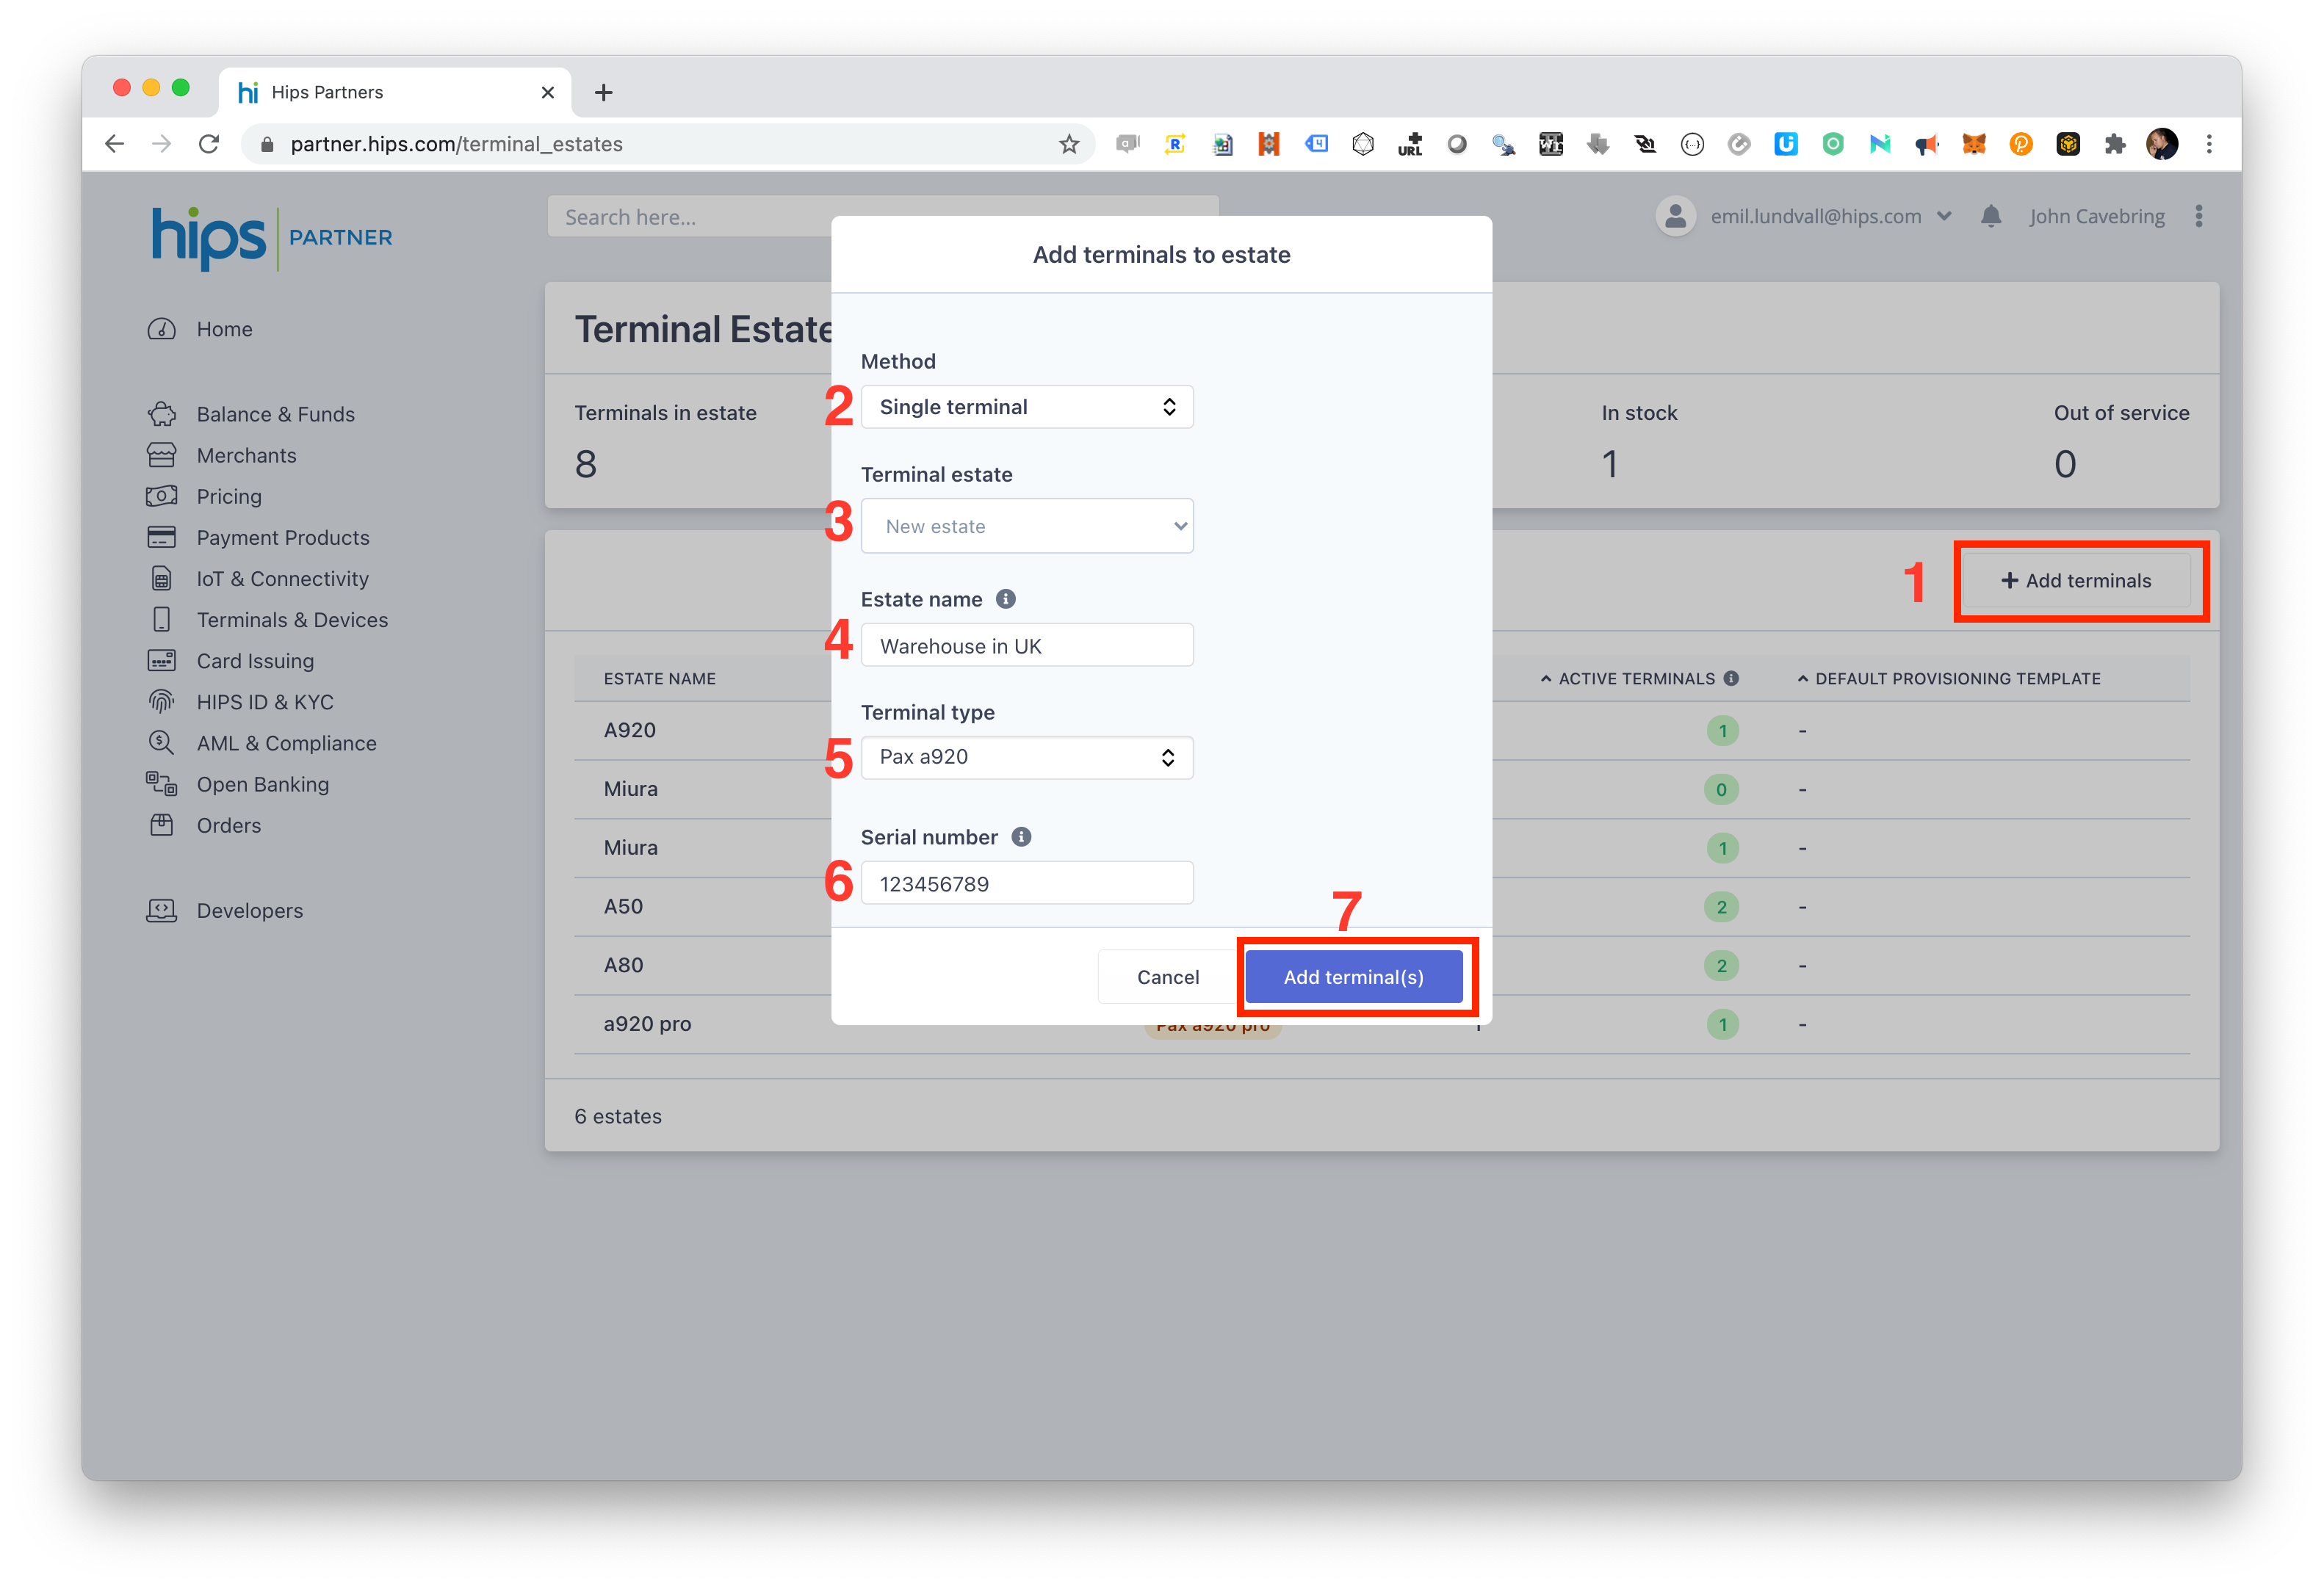
Click add terminals (1) then choose "Single terminal" in the drop down list (2). Choose an existing terminal estate or create a new one (3). Enter an estate name (ie. warehouse location) (4). Choose terminal type (5) and enter the serial number of the terminal (6) then click Add terminal (7)
Its extremely important that you choose correct terminal type when adding terminals to an estate. It's also important that you enter the correct serial number. If a terminal is already added to an estate owned by you or another gateway will result in the terminal not being added to the estate.
If you are managing many terminals, we recommend you to purchase a barcode scanner to scan serial numbers instead of manually having to enter them for each terminal you connect.
Connect terminal to a merchant and provision the terminal
Navigate into a merchant on which you want to connect the terminal to. To add a new merchant to your partner account, please see the separate guide for adding merchants.
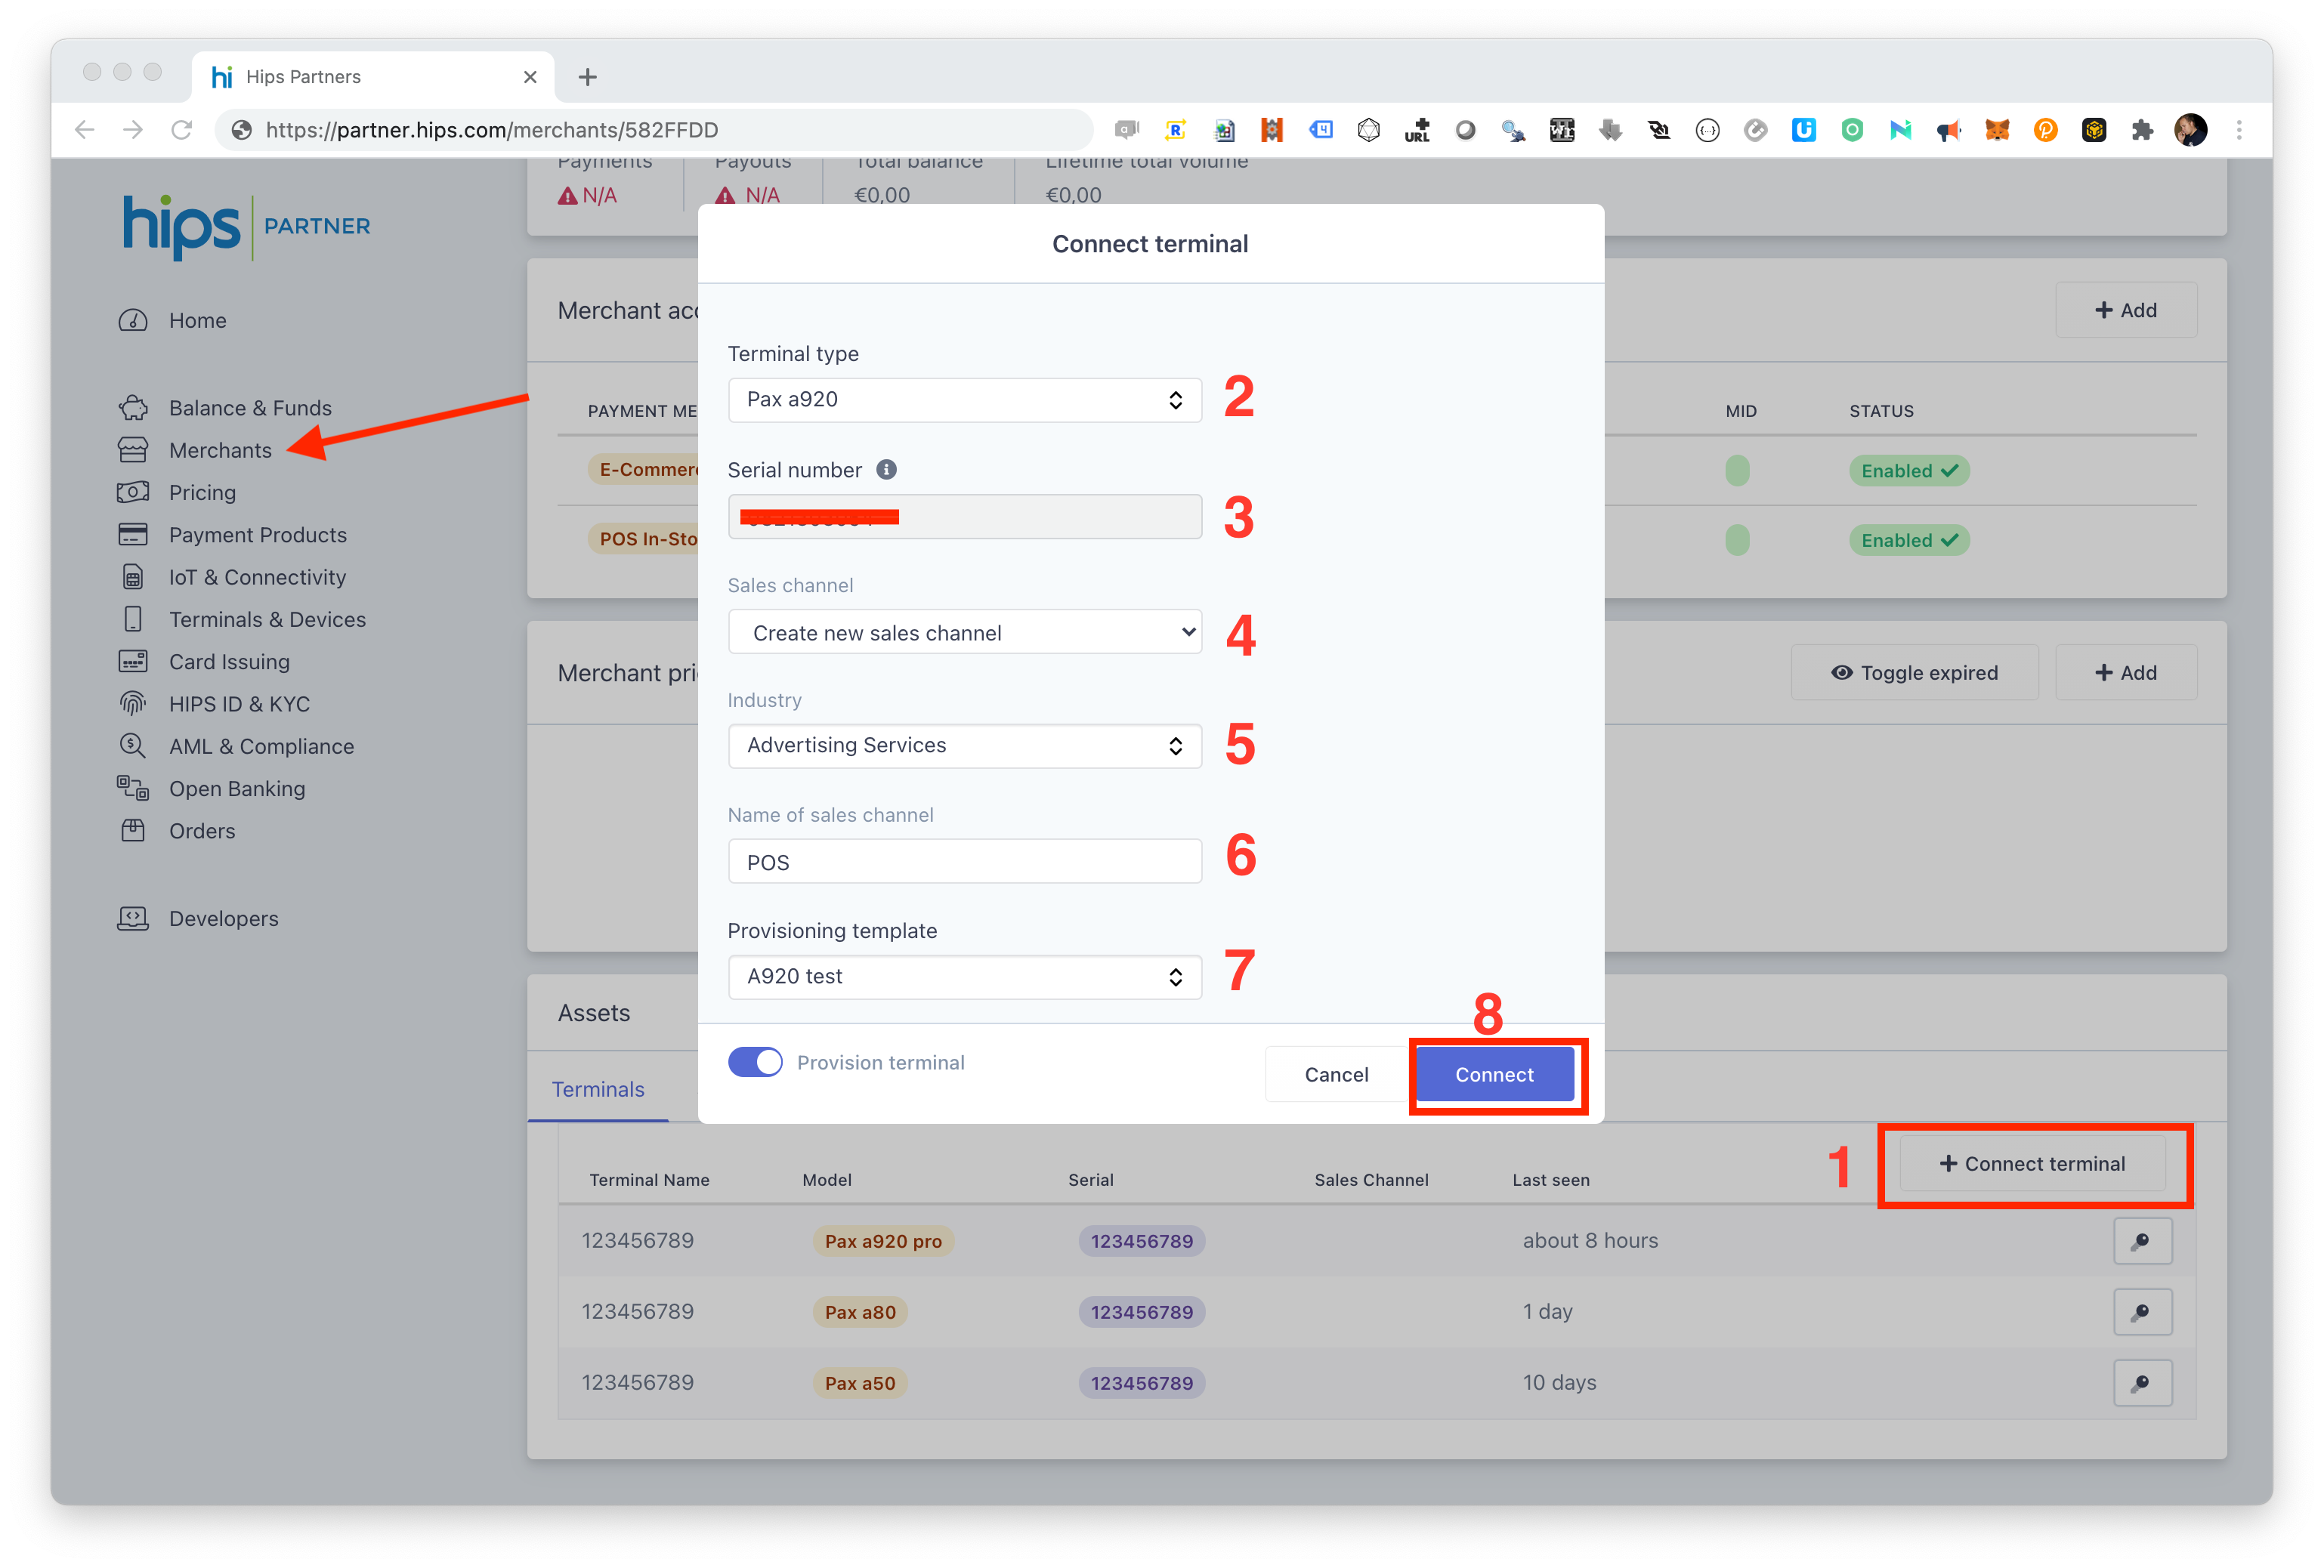
On the merchant page, scroll down to the terminal section and click "Connect terminal" (1). Choose terminal model (2). Enter the serial number of the terminal you want to connect to the merchant account (3). Choose an existing sales channel or create a new one (4). For new sales channels, please select MCC code (5). Name your sales channel (6). Choose a template (this option will only be available if you have created provisioning templates - see separate guide). Click "Connect" to add the terminal to the merchant account.
Provisioning TemplatesA provisioning template can be selected. It contains information about how different parameters should be automatically configured in the terminal, such as language, currency, tipping, offline transaction limits and custom logotypes on display and receipts among other things.
Automatic provisioning of payment application
Once the above steps are done your terminal will be automatically provisioned with all the applications and configurations required for the specific merchant you have connected it to.
To start the provisioning process you can reboot the terminal by holding the power button for 5 seconds and choose reboot or you can click on the PAXSTORE icon, and just wait a few seconds.
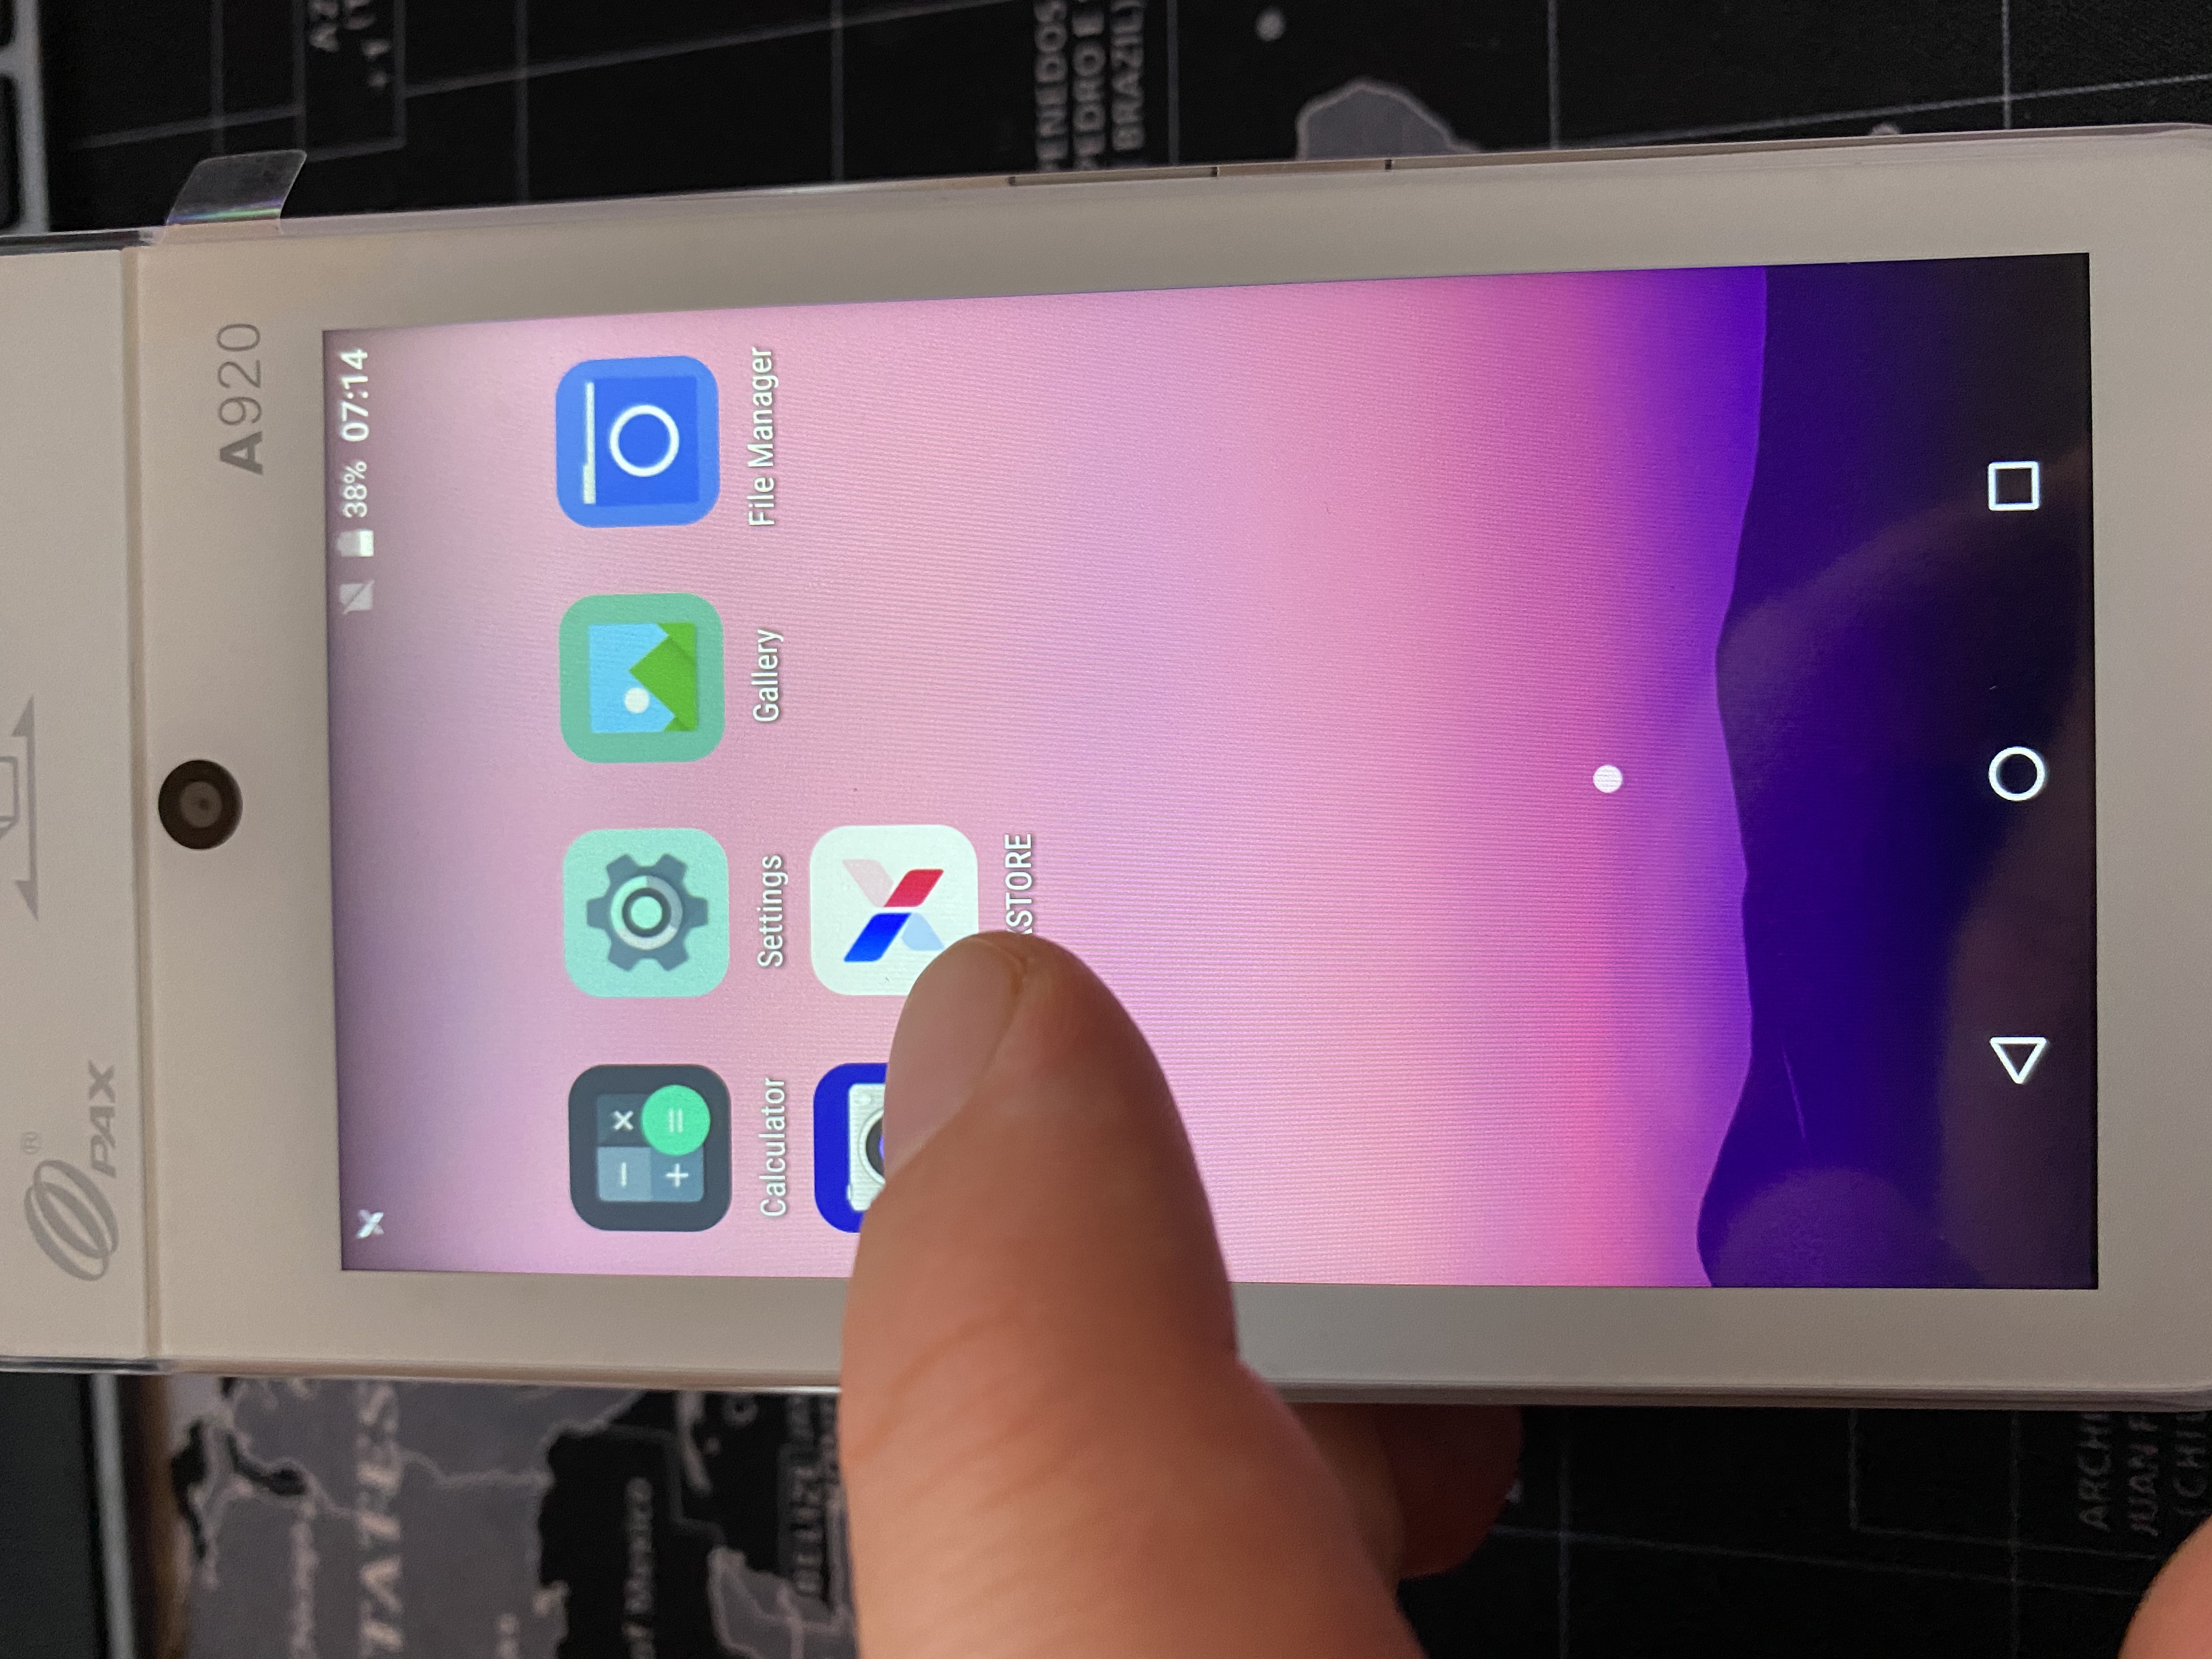
Click on the PAXSTORE icon to start the provisioning of the terminal.It takes a few seconds before the provisioning starts and you will hear a sound from the terminal every time a file is downloaded to the terminal.
The terminal will now reboot and play a sound, just wait...
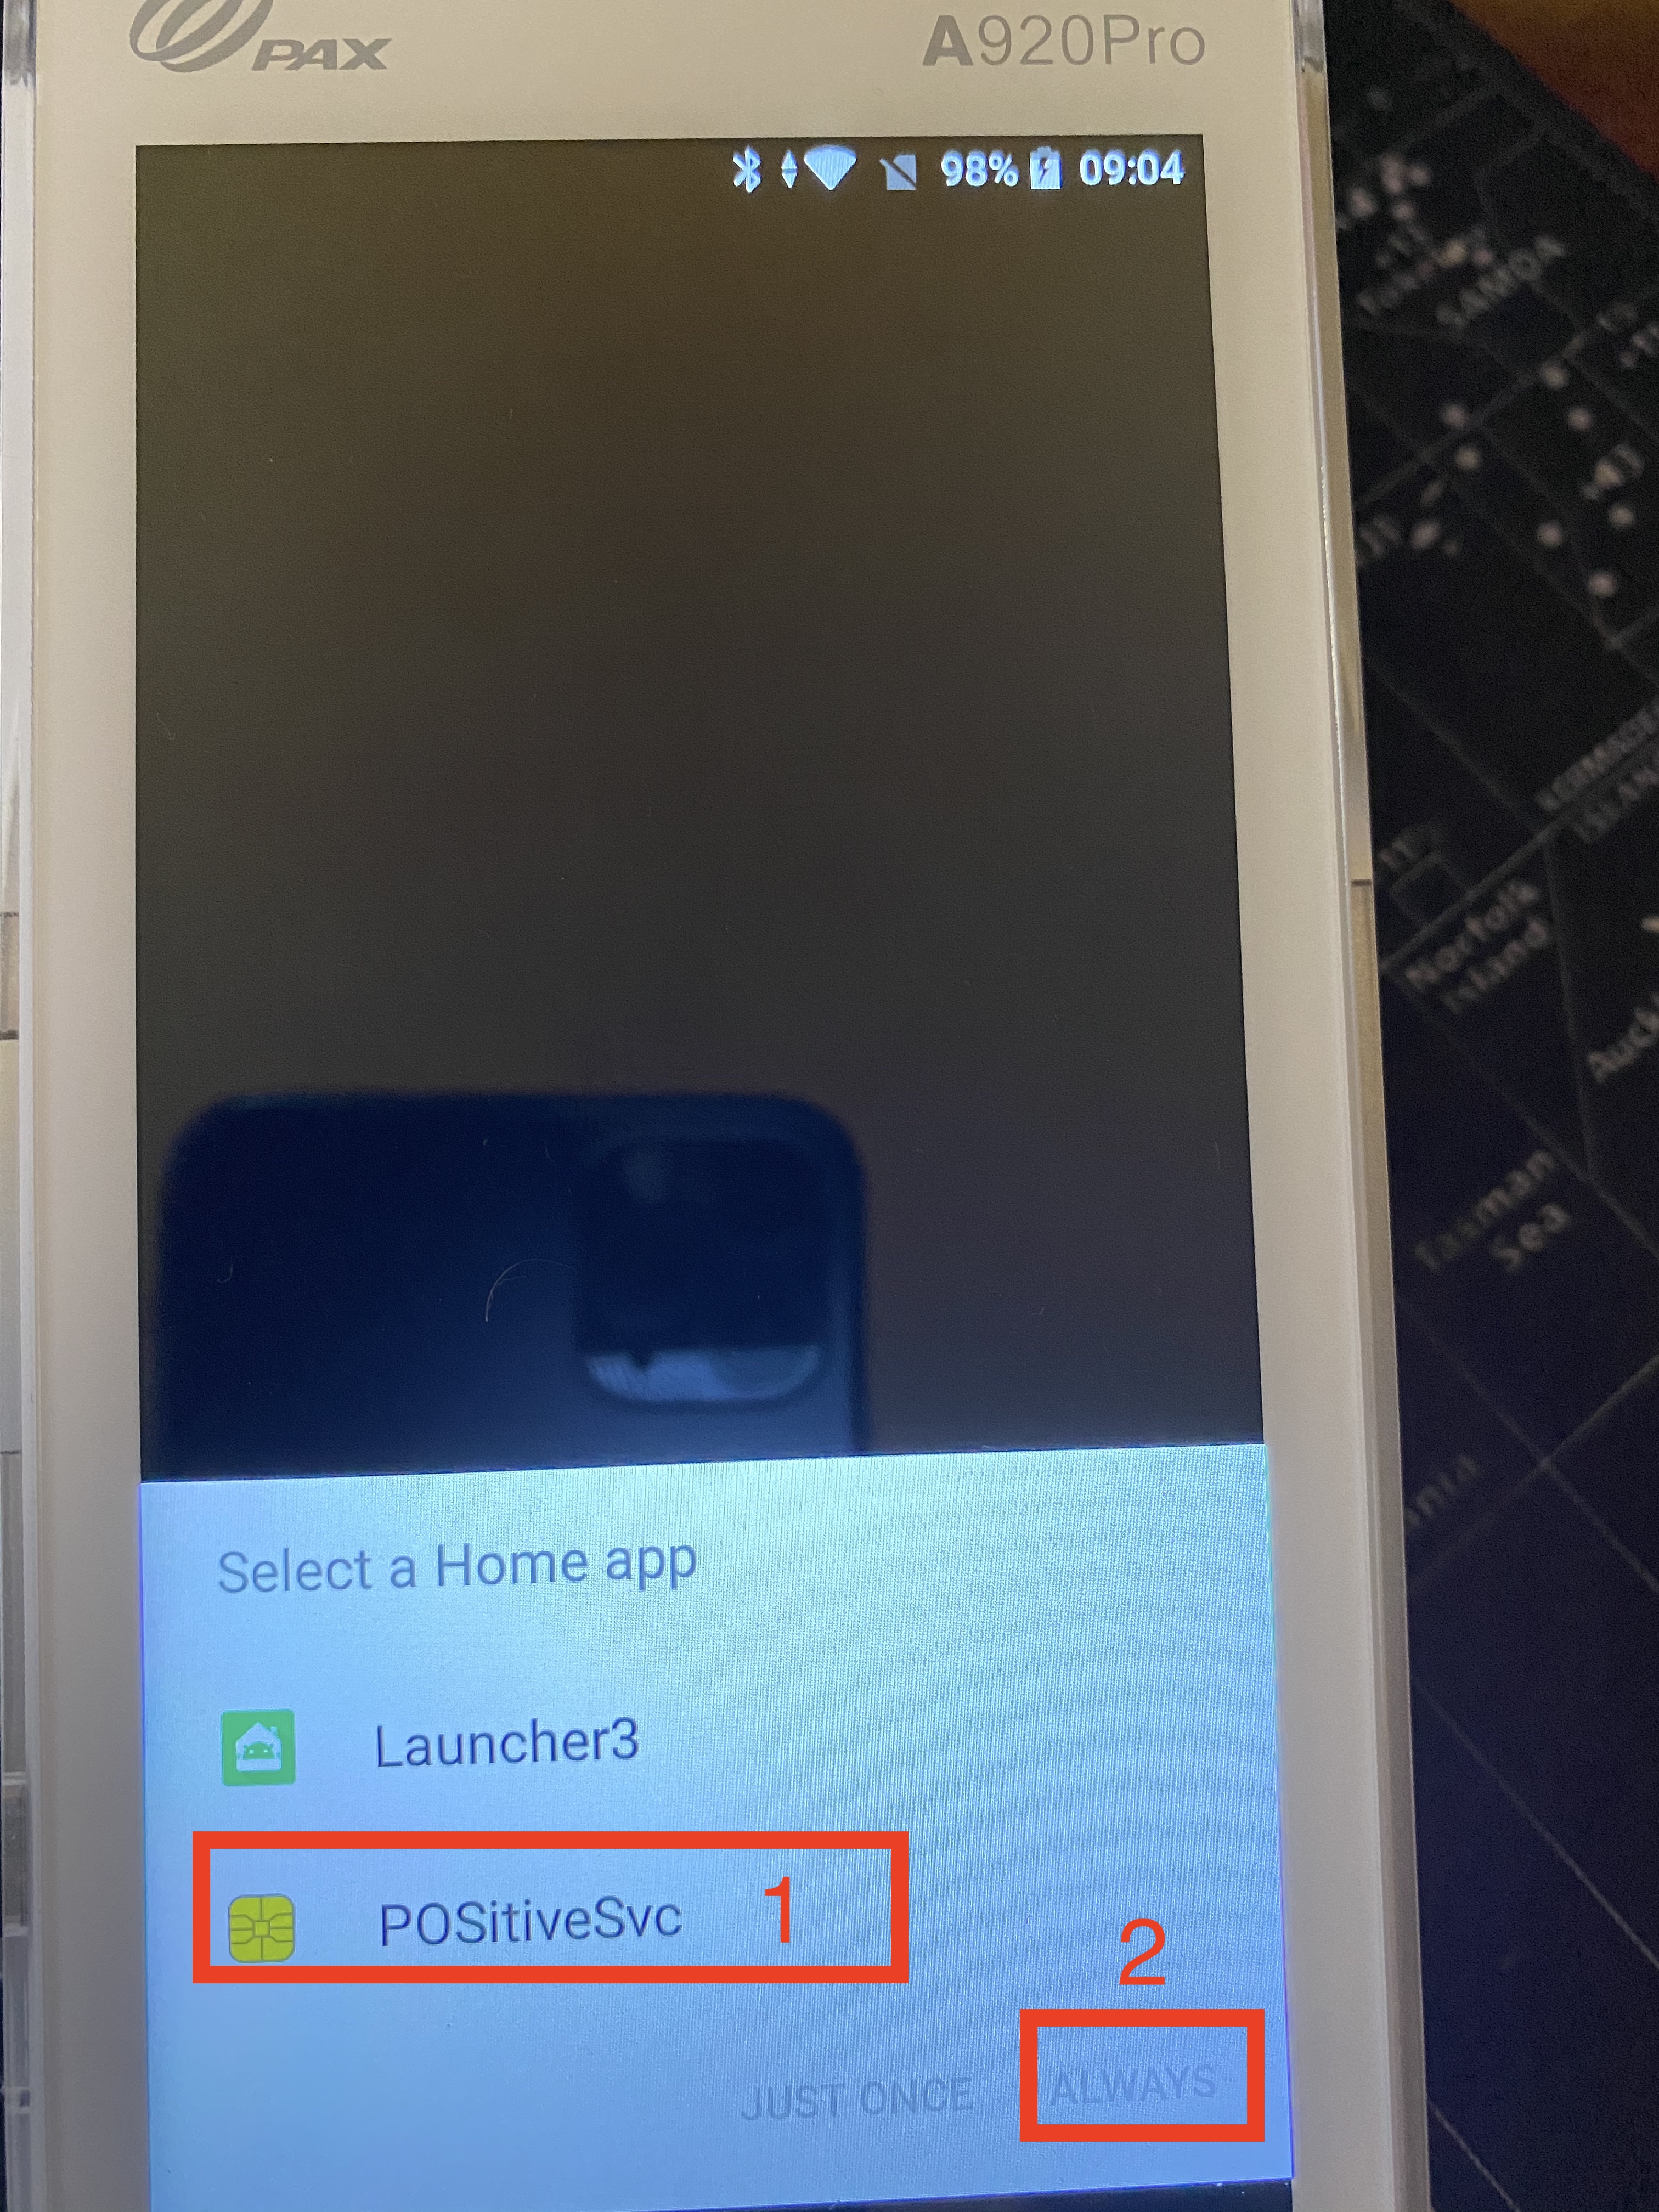
The terminal will reboot and on some models (PAX A920Pro) the OS will ask for the default application launcher. Select POSitiveSvc (1) and then click "ALWAYS" (2).
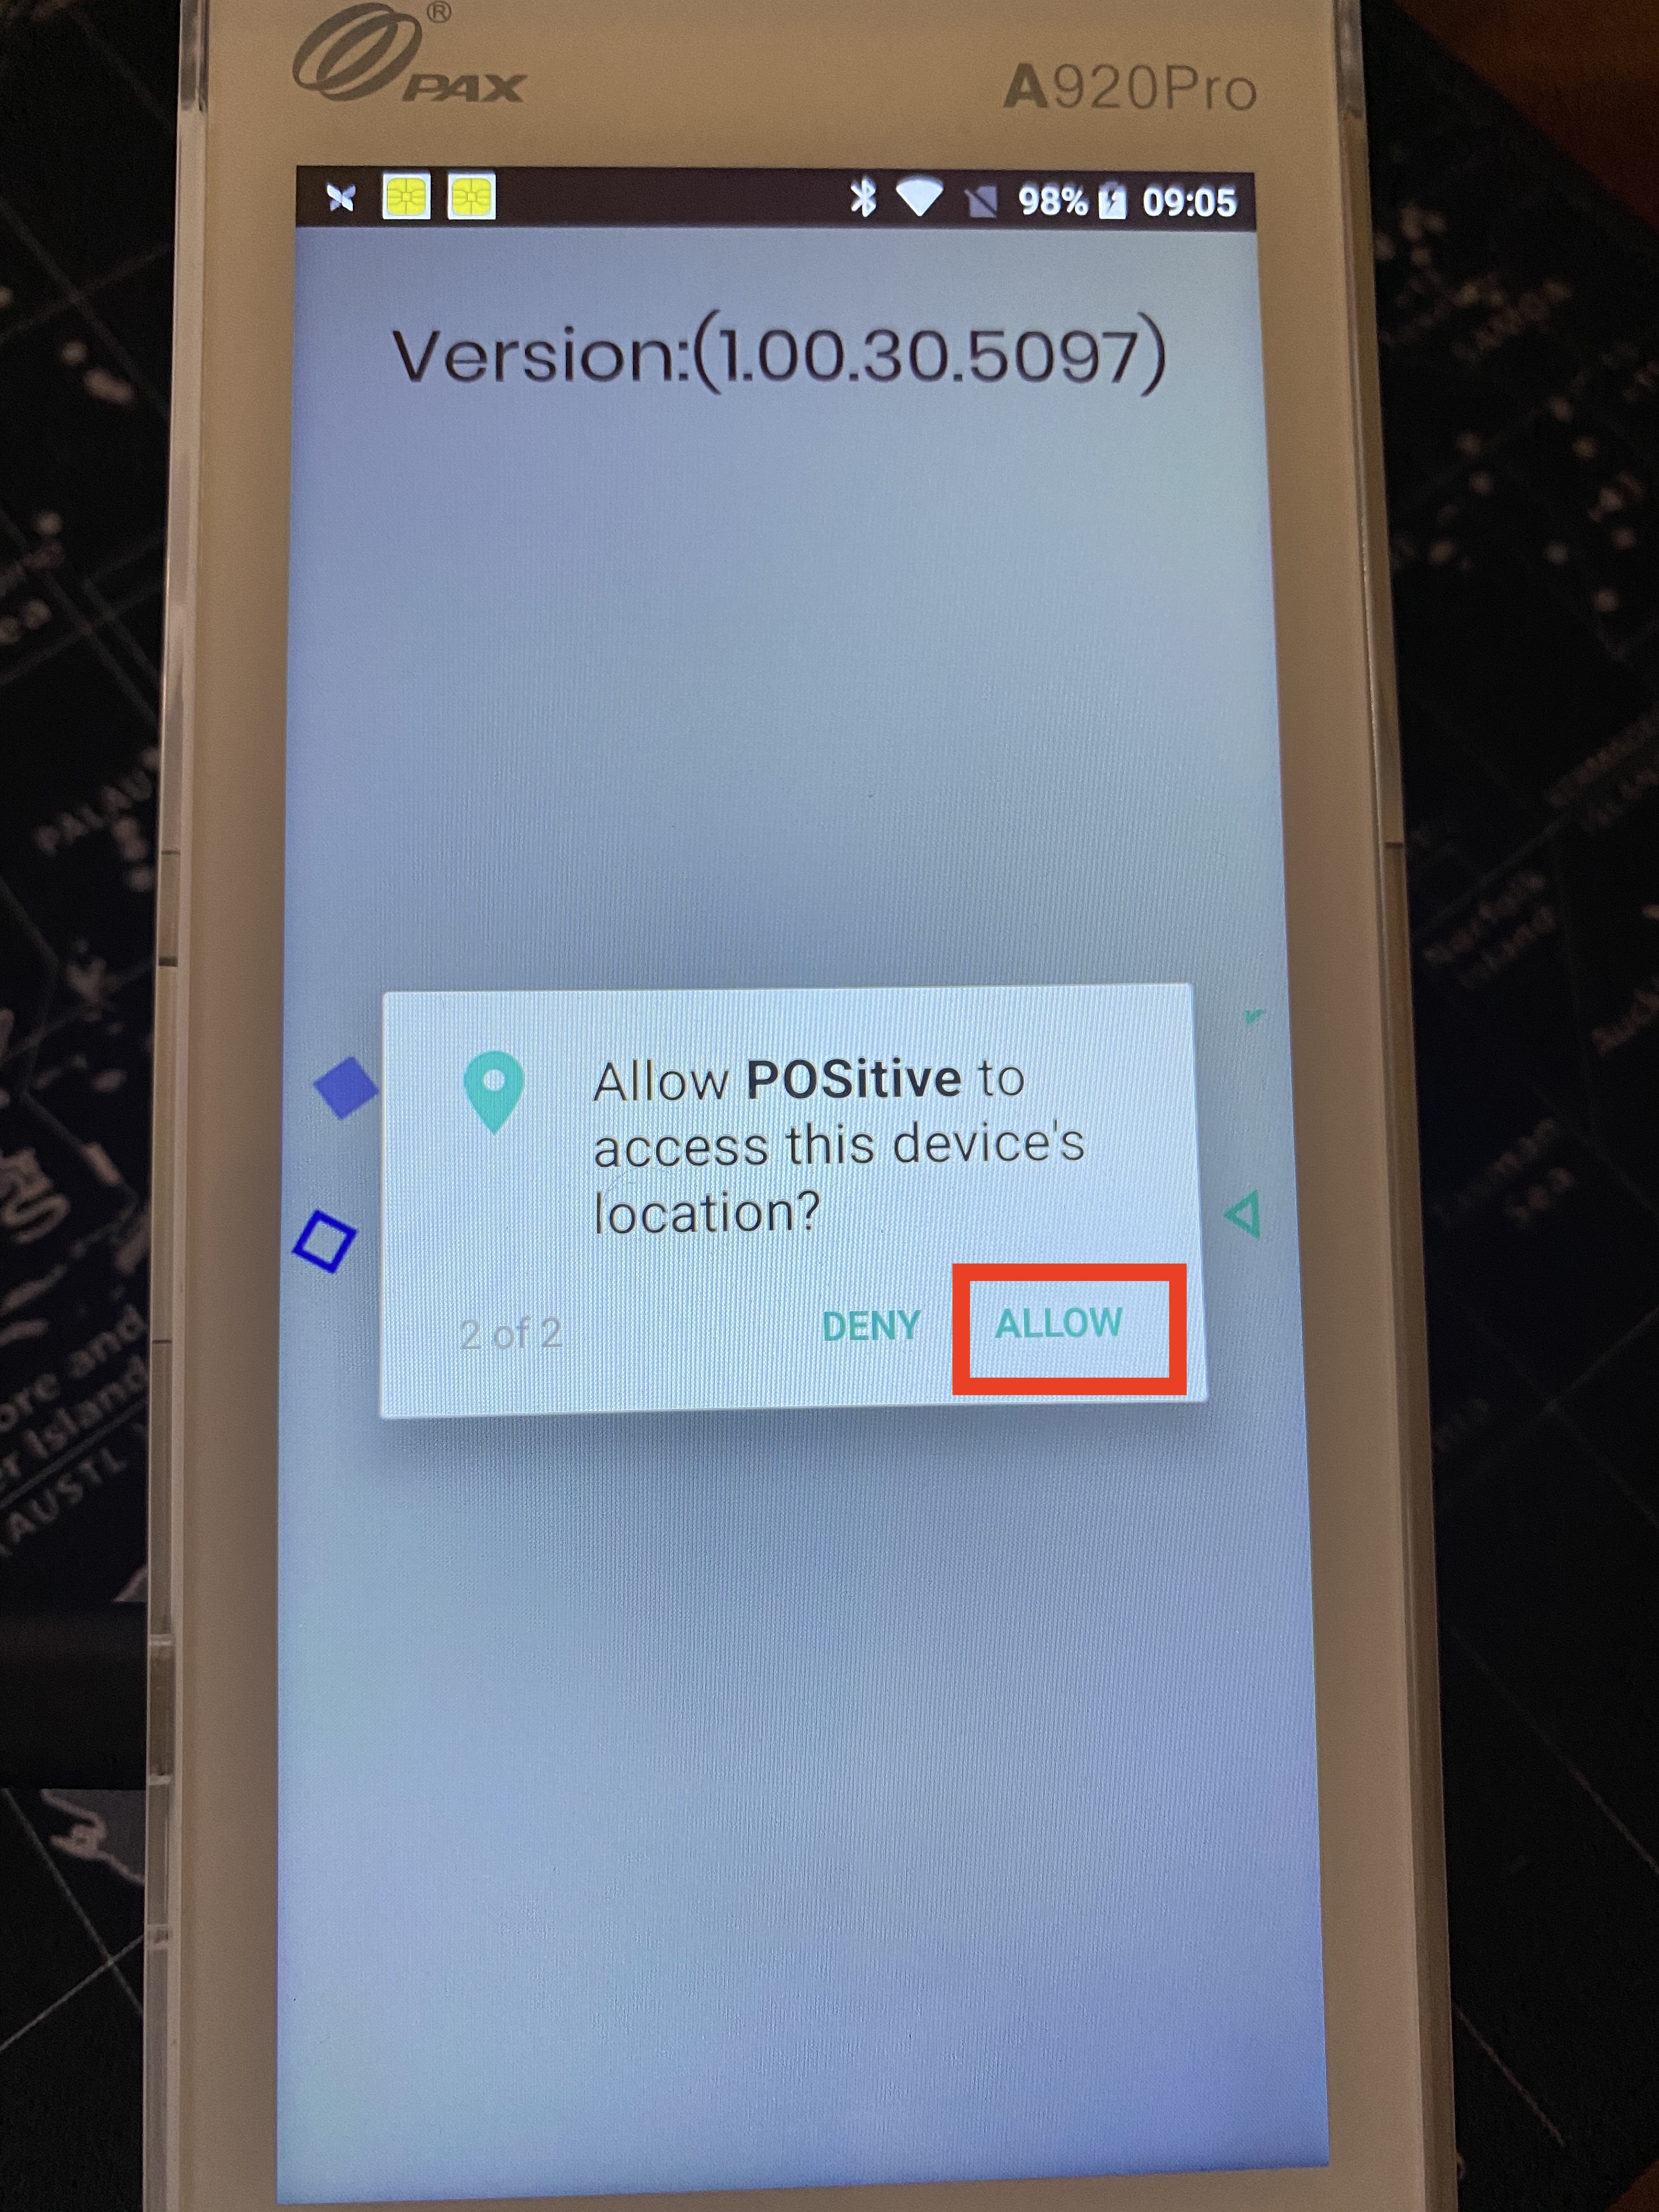
When the payment application launches, it will ask for permissions. ALWAYS APPROVE ALL
Approve all permission requestsyou must approve all permission requests or the payment application will not work.
First time run of the payment application
When you run the payment application for the first time you have to setup an administrator account.
For your convenience, you can choose to remember the administrative credentials, then you will not be asked to log in every time the terminal reboots.
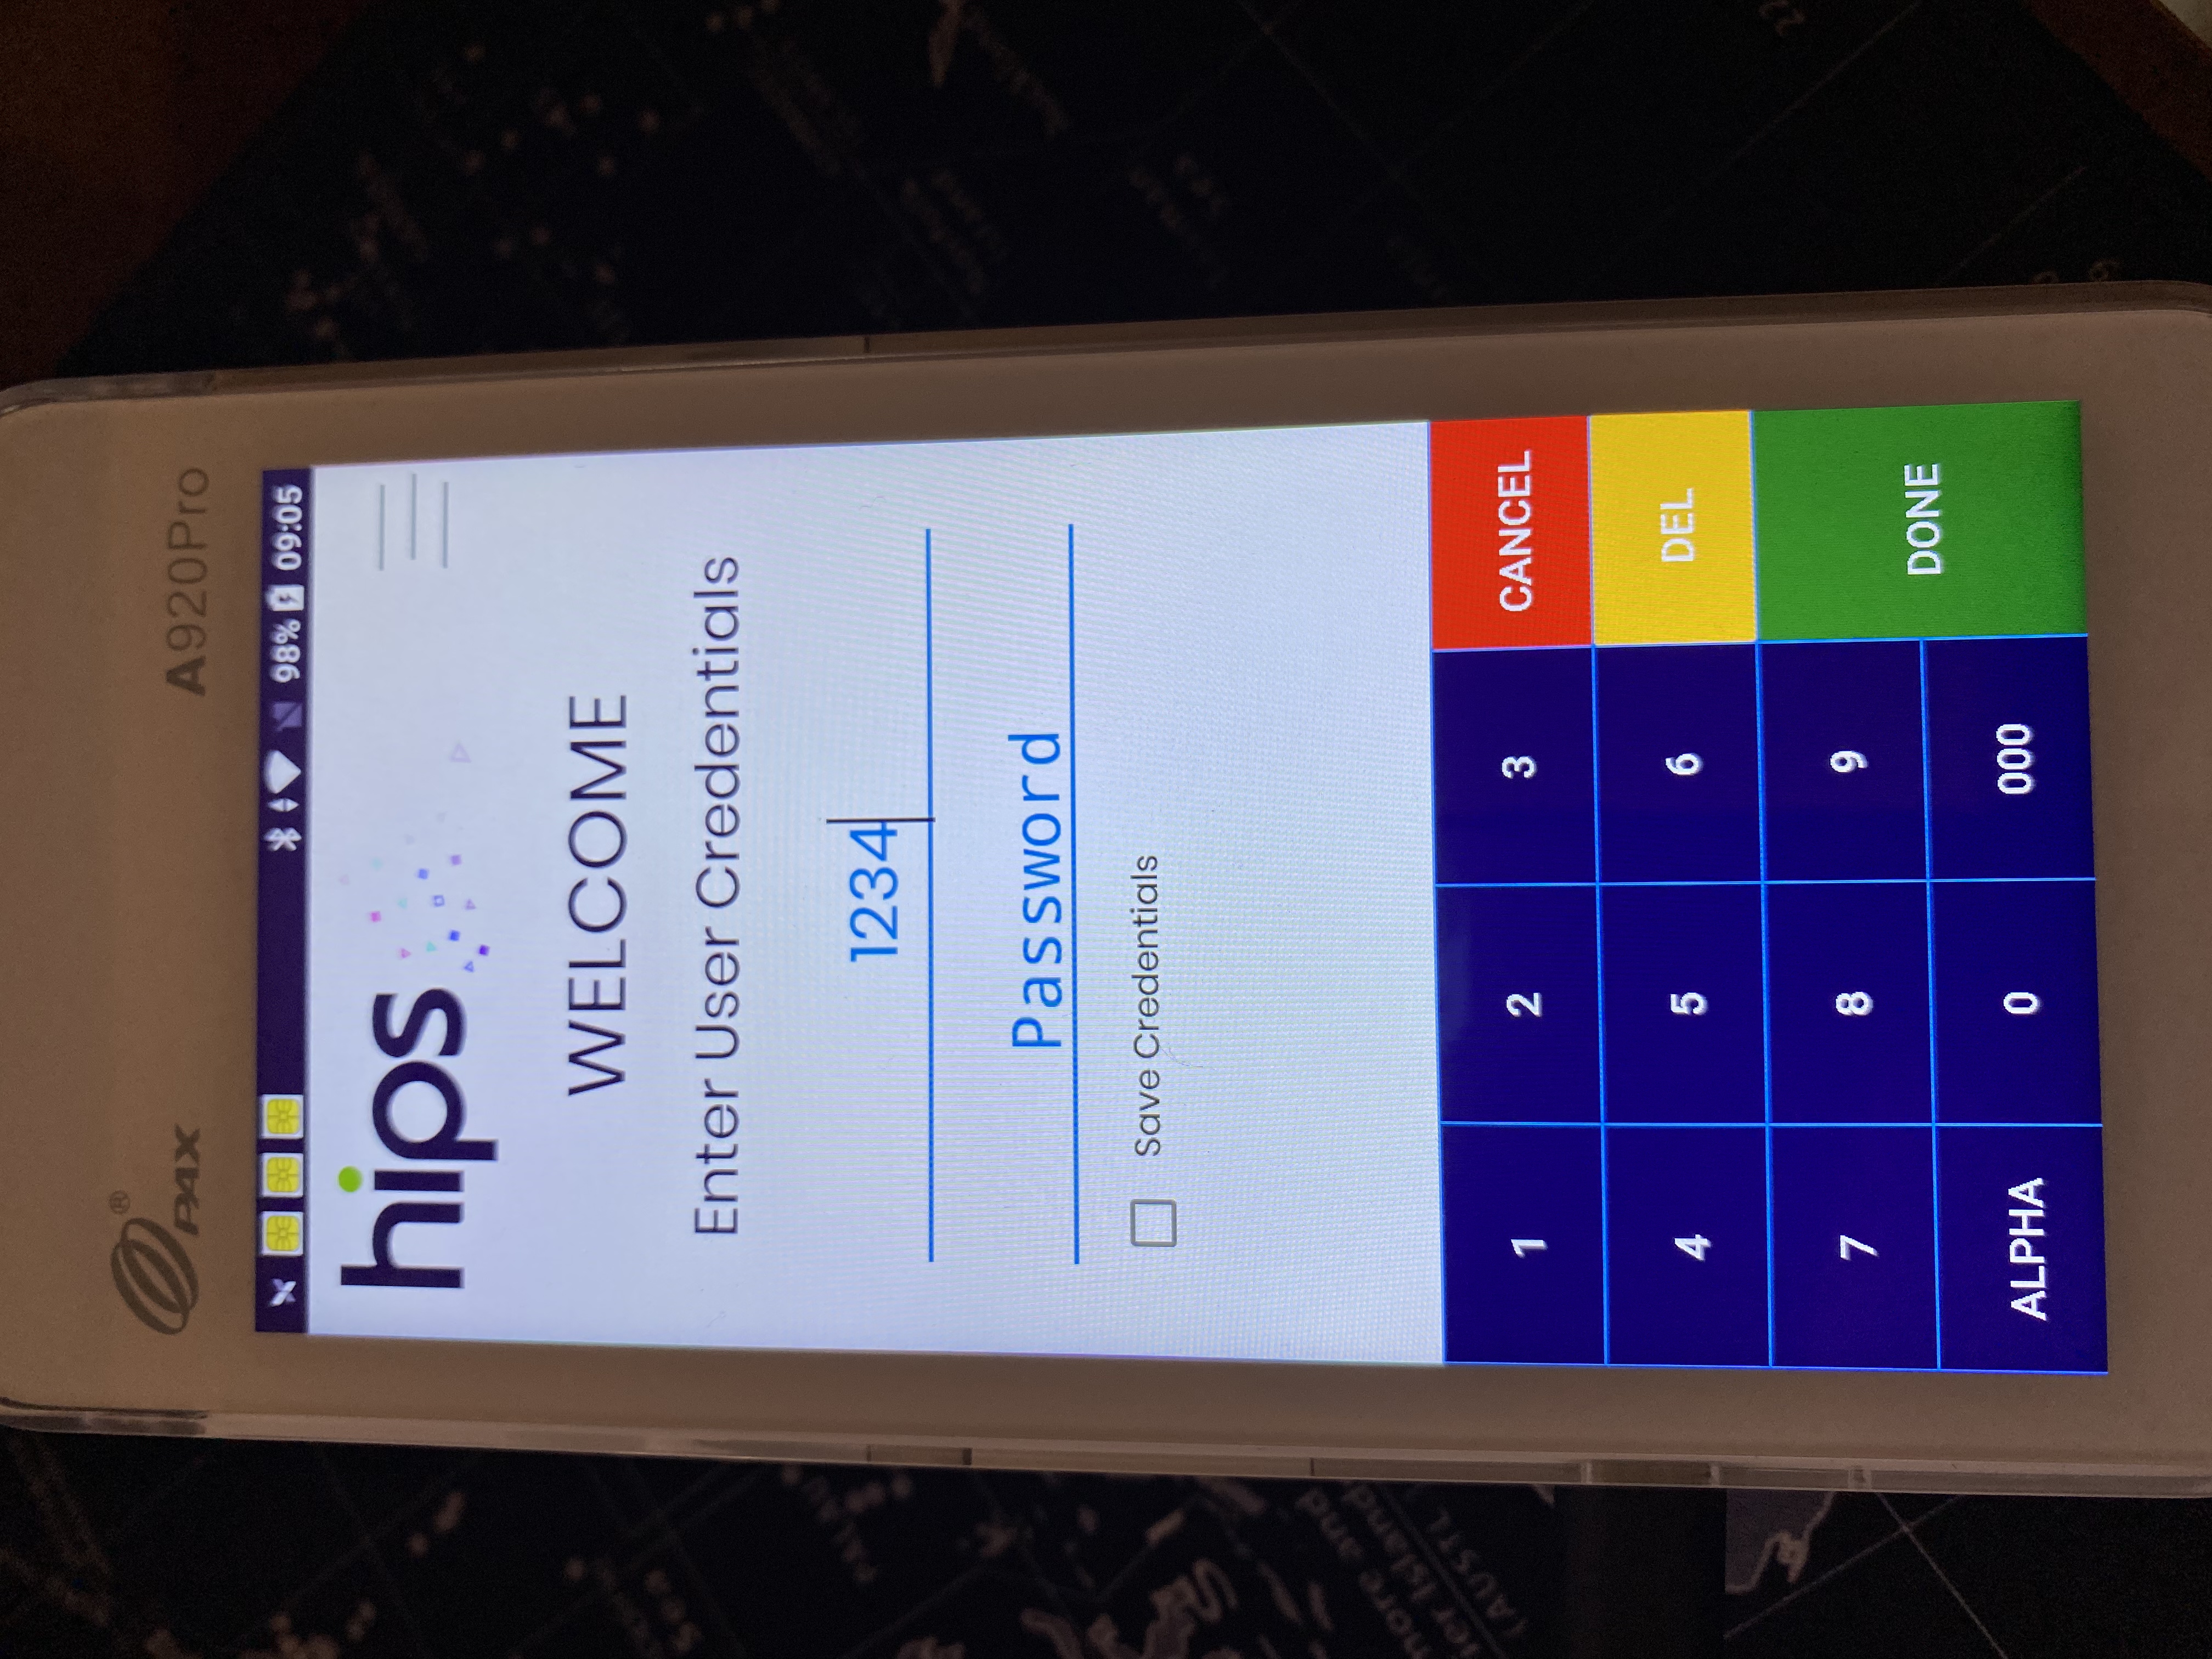
Login with the default user 1234 and password 1234
Default userUsername: 1234
Password: 1234
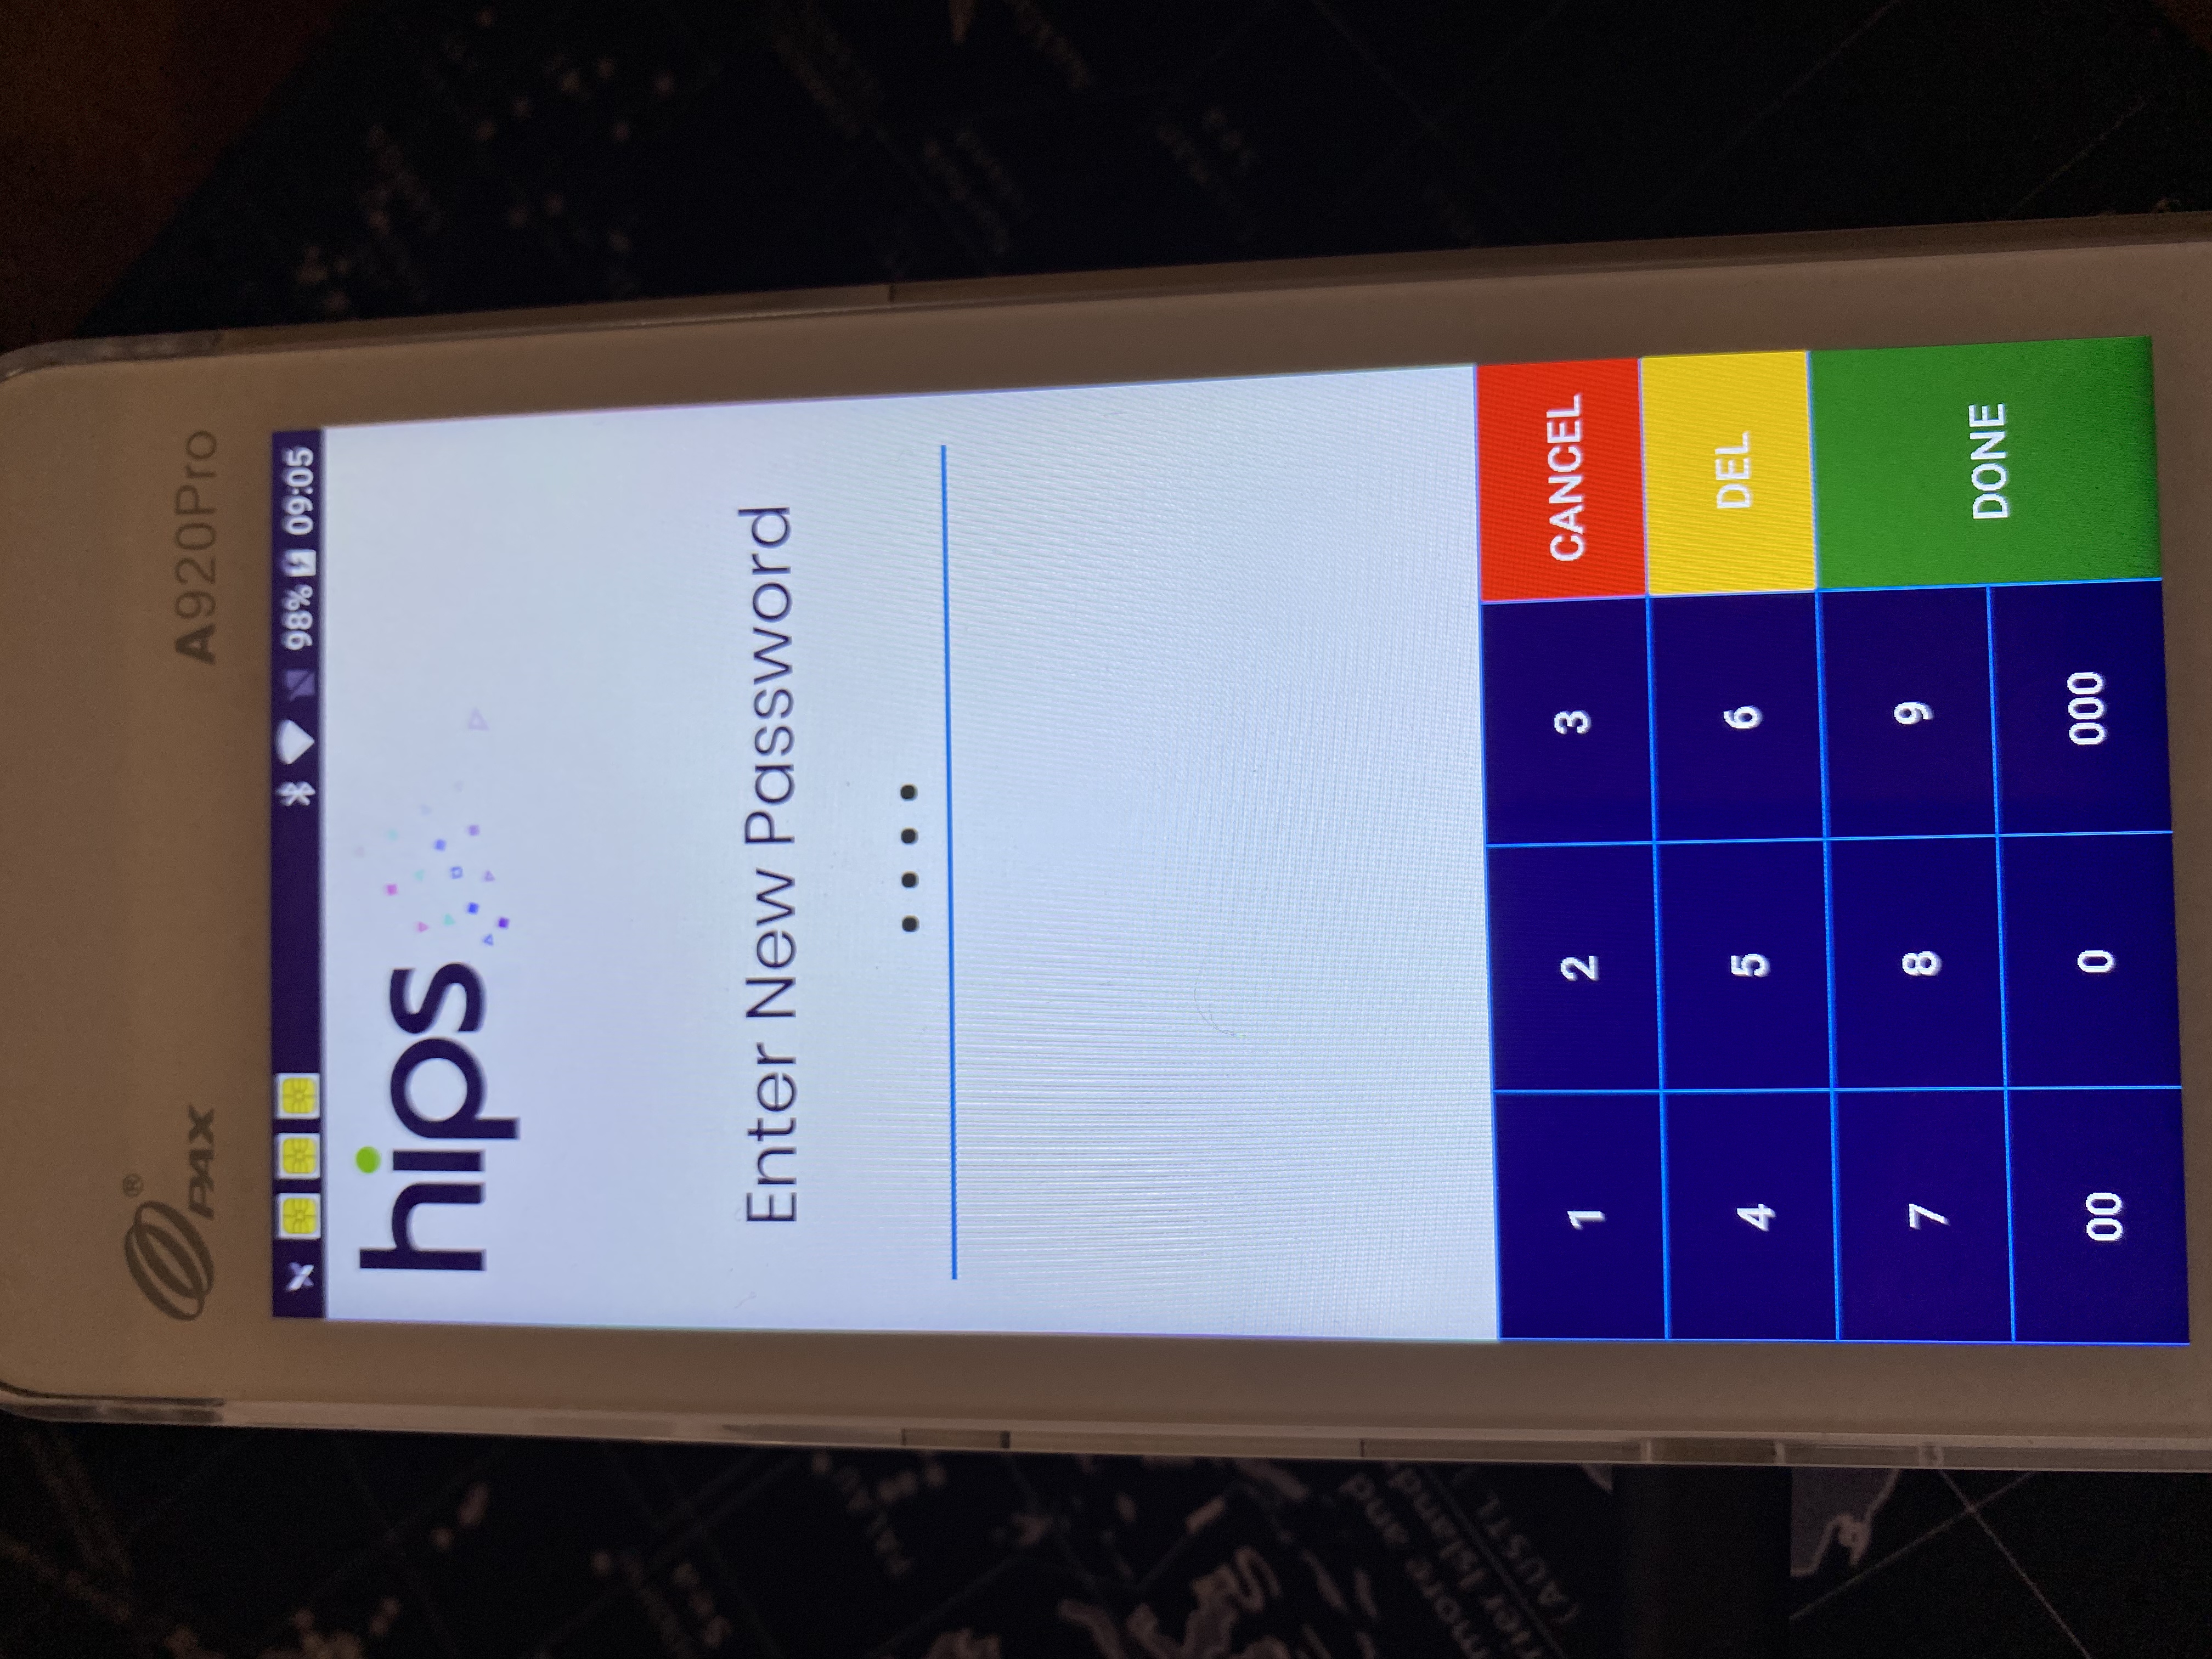
You can now choose a new password for the user 1234.
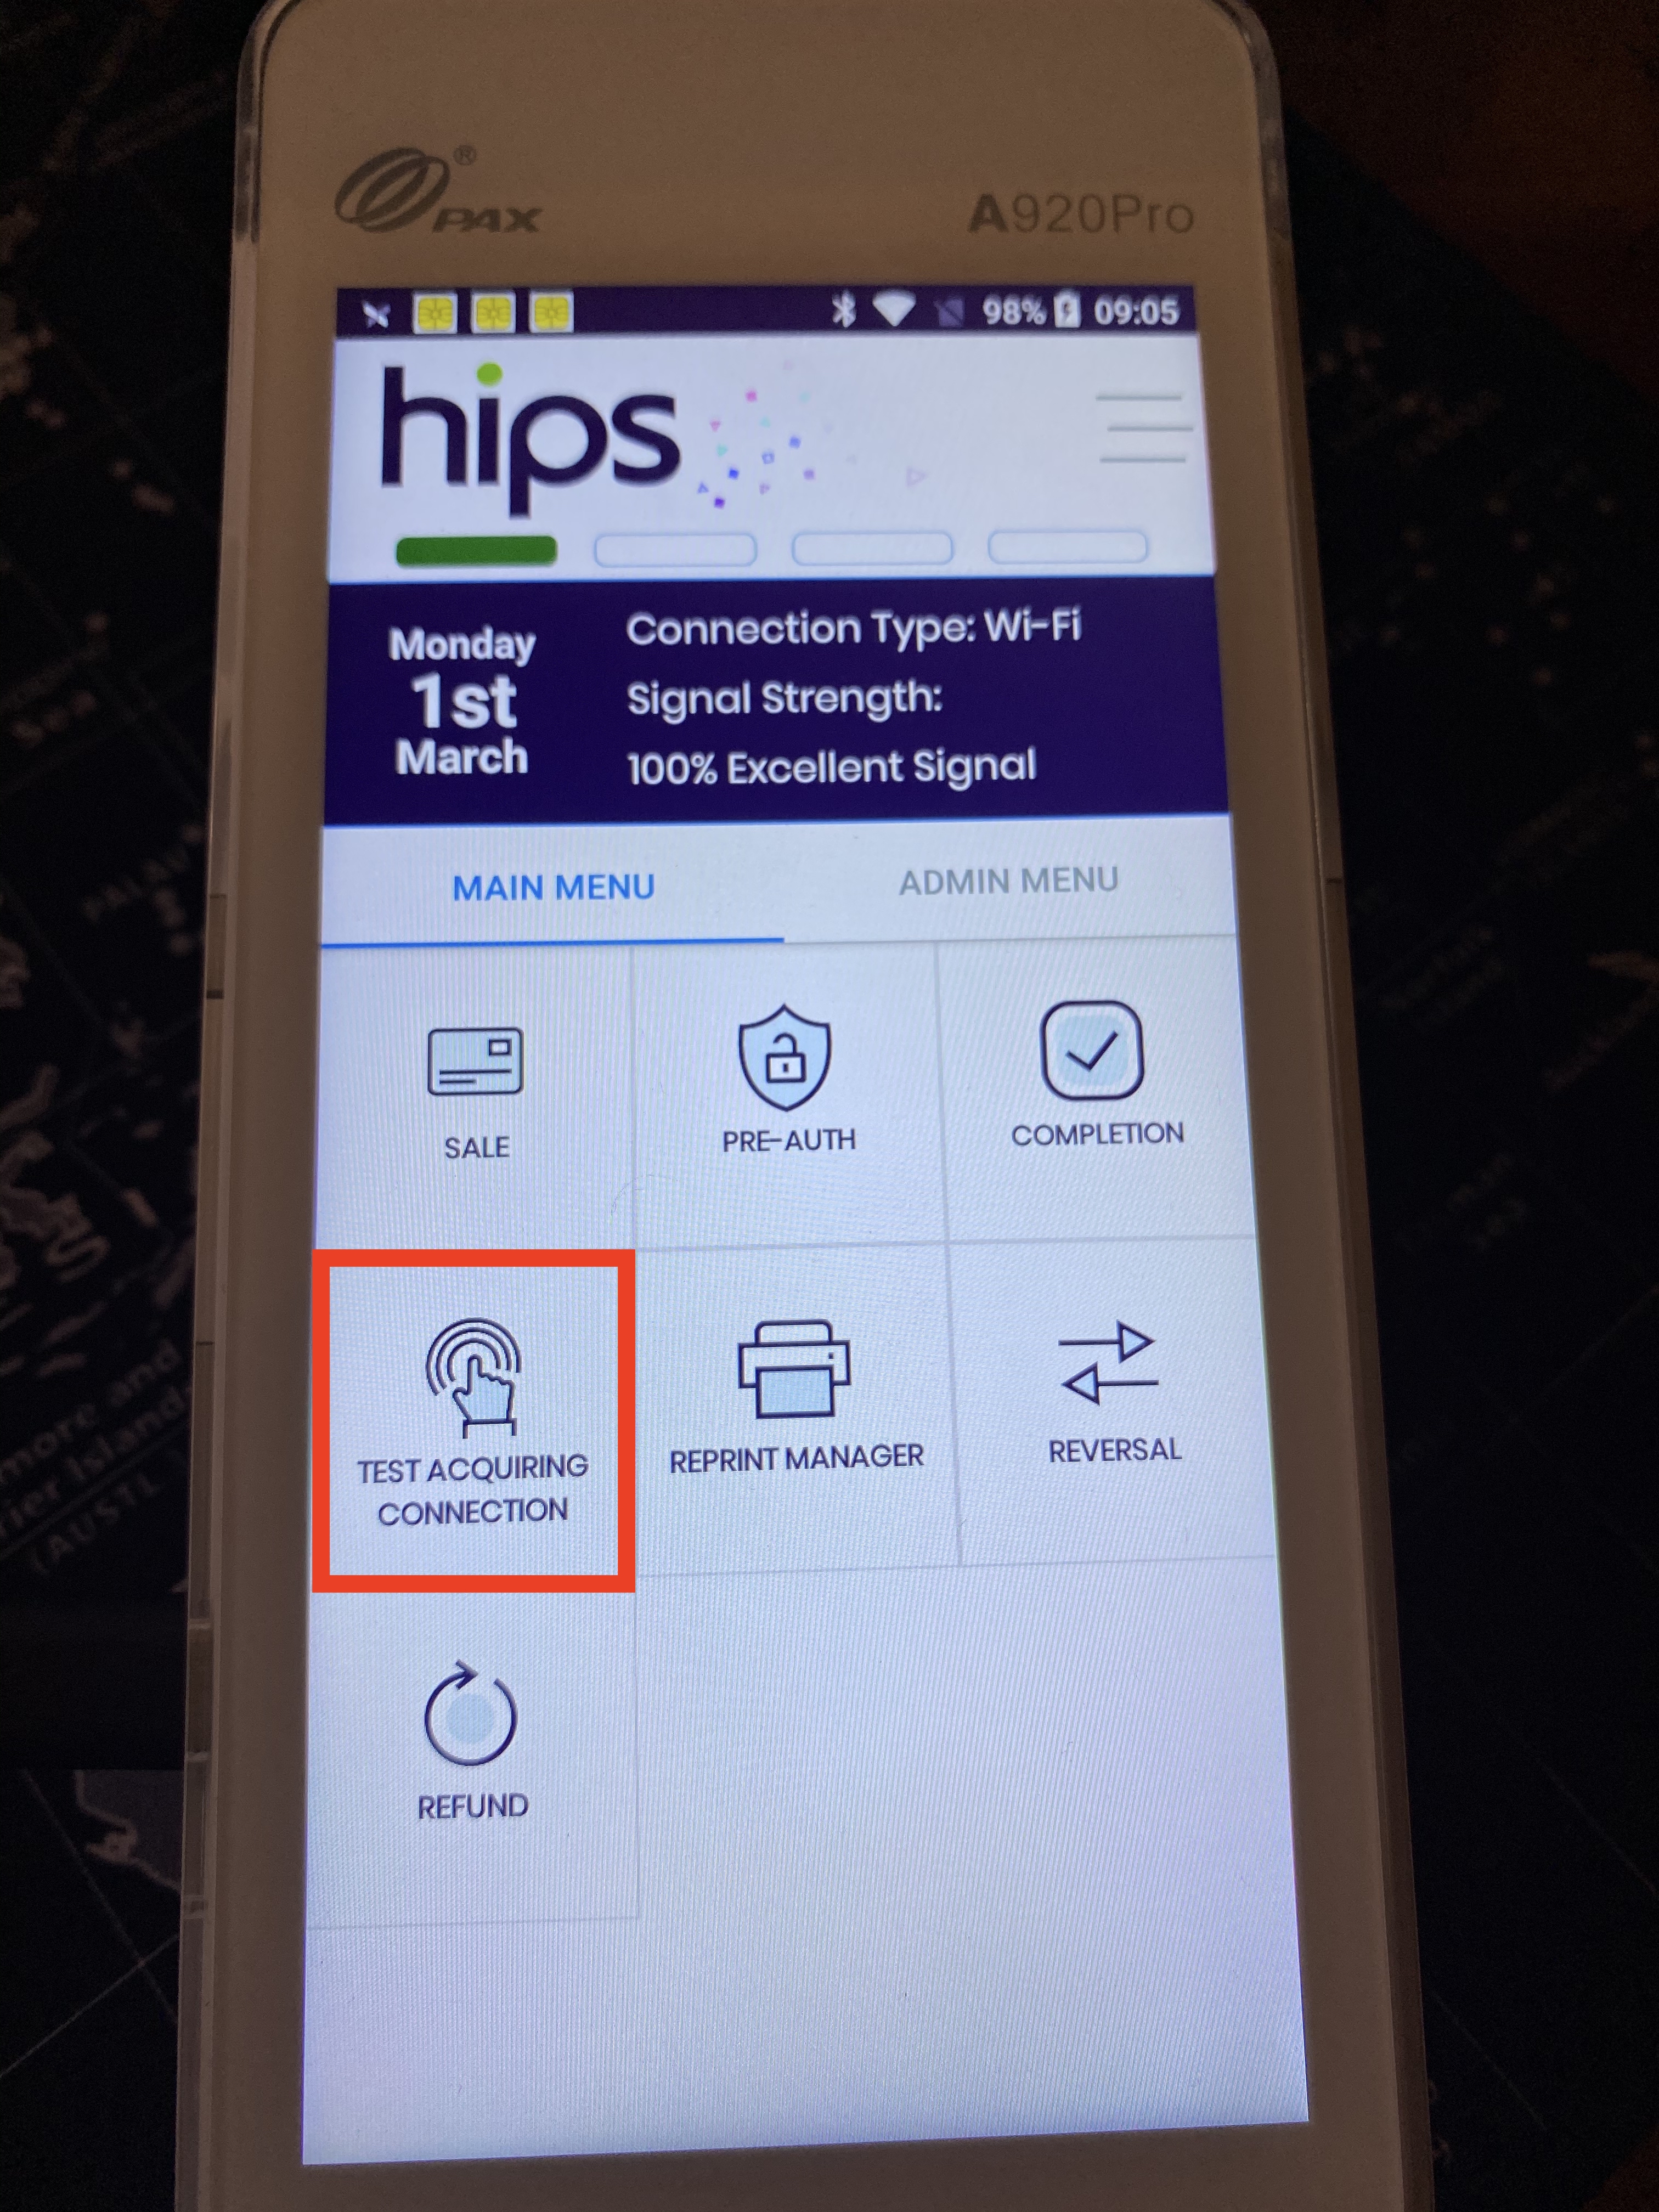
Test the connection to the merchant account by clicking "Test acquiring connection"
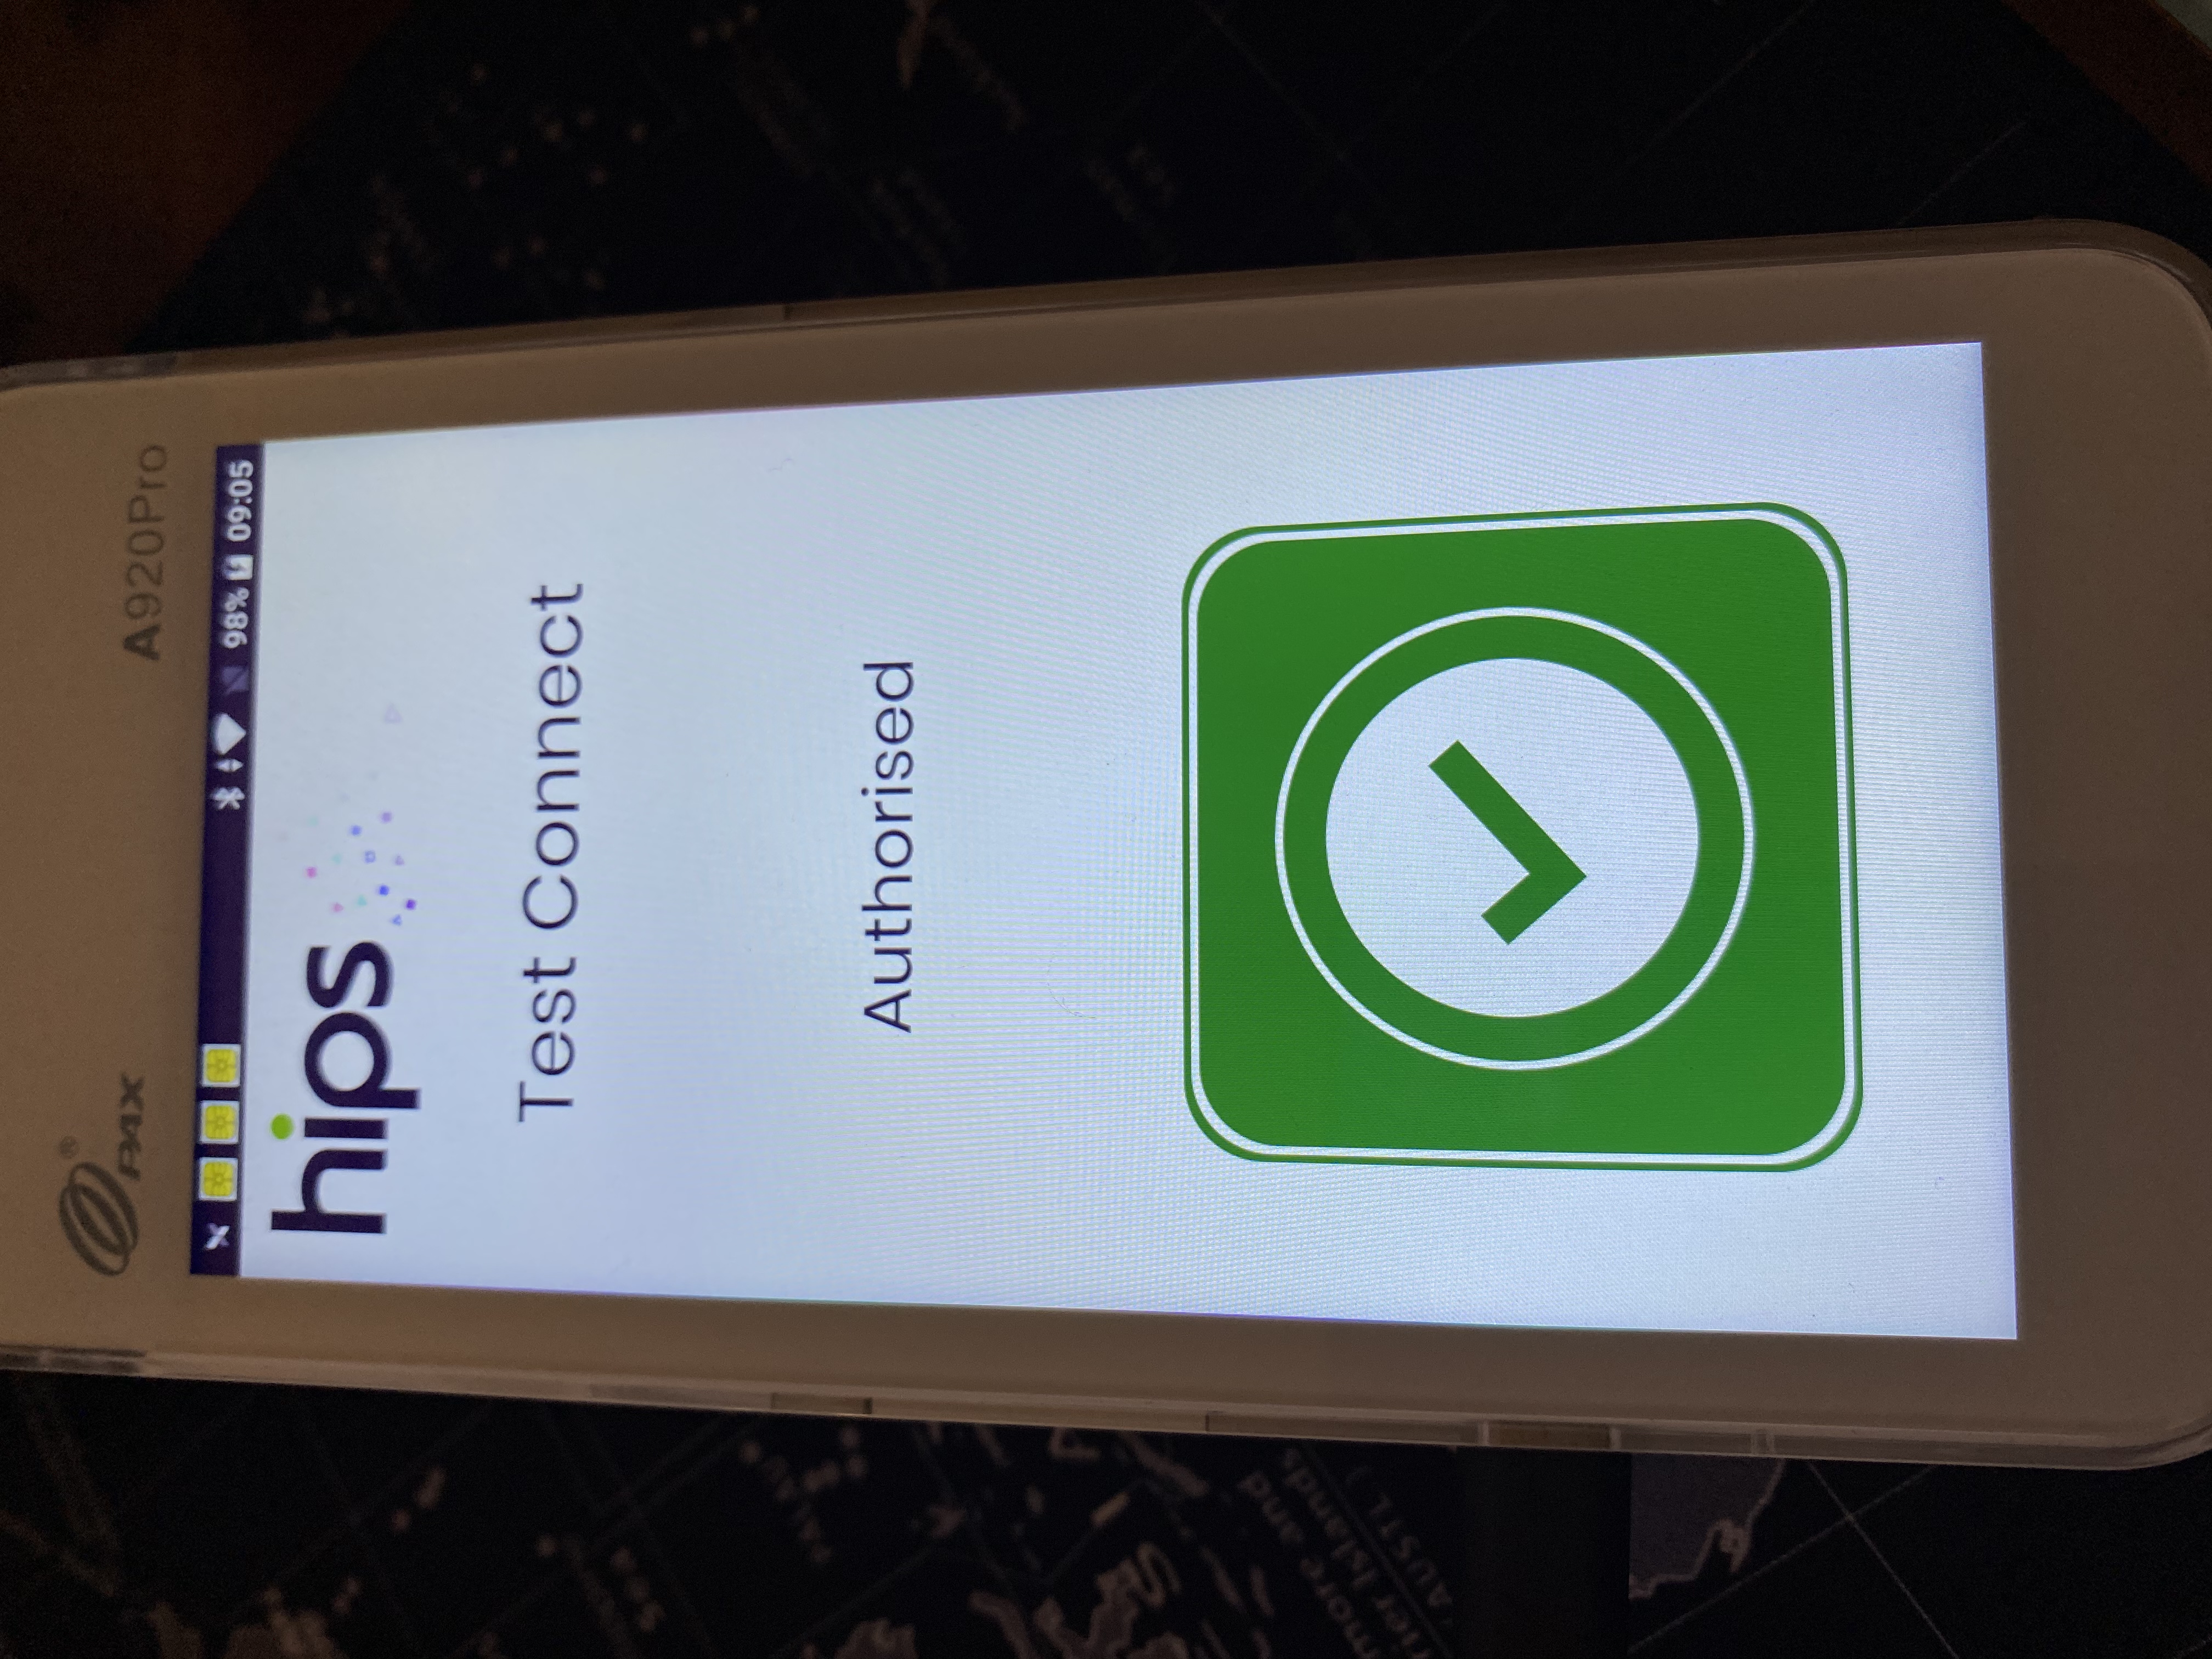
All done
You're all set!If you get the message "Test Connect - Authorized" then you are all set. The terminal is now ready to use.
Updated 8 months ago
